Wednesday, 20 November 2024

Jewelry Box Projects for Organizing and Storing Jewelry in Style

Jewelry Box Projects for Organizing and Storing Jewelry in Style

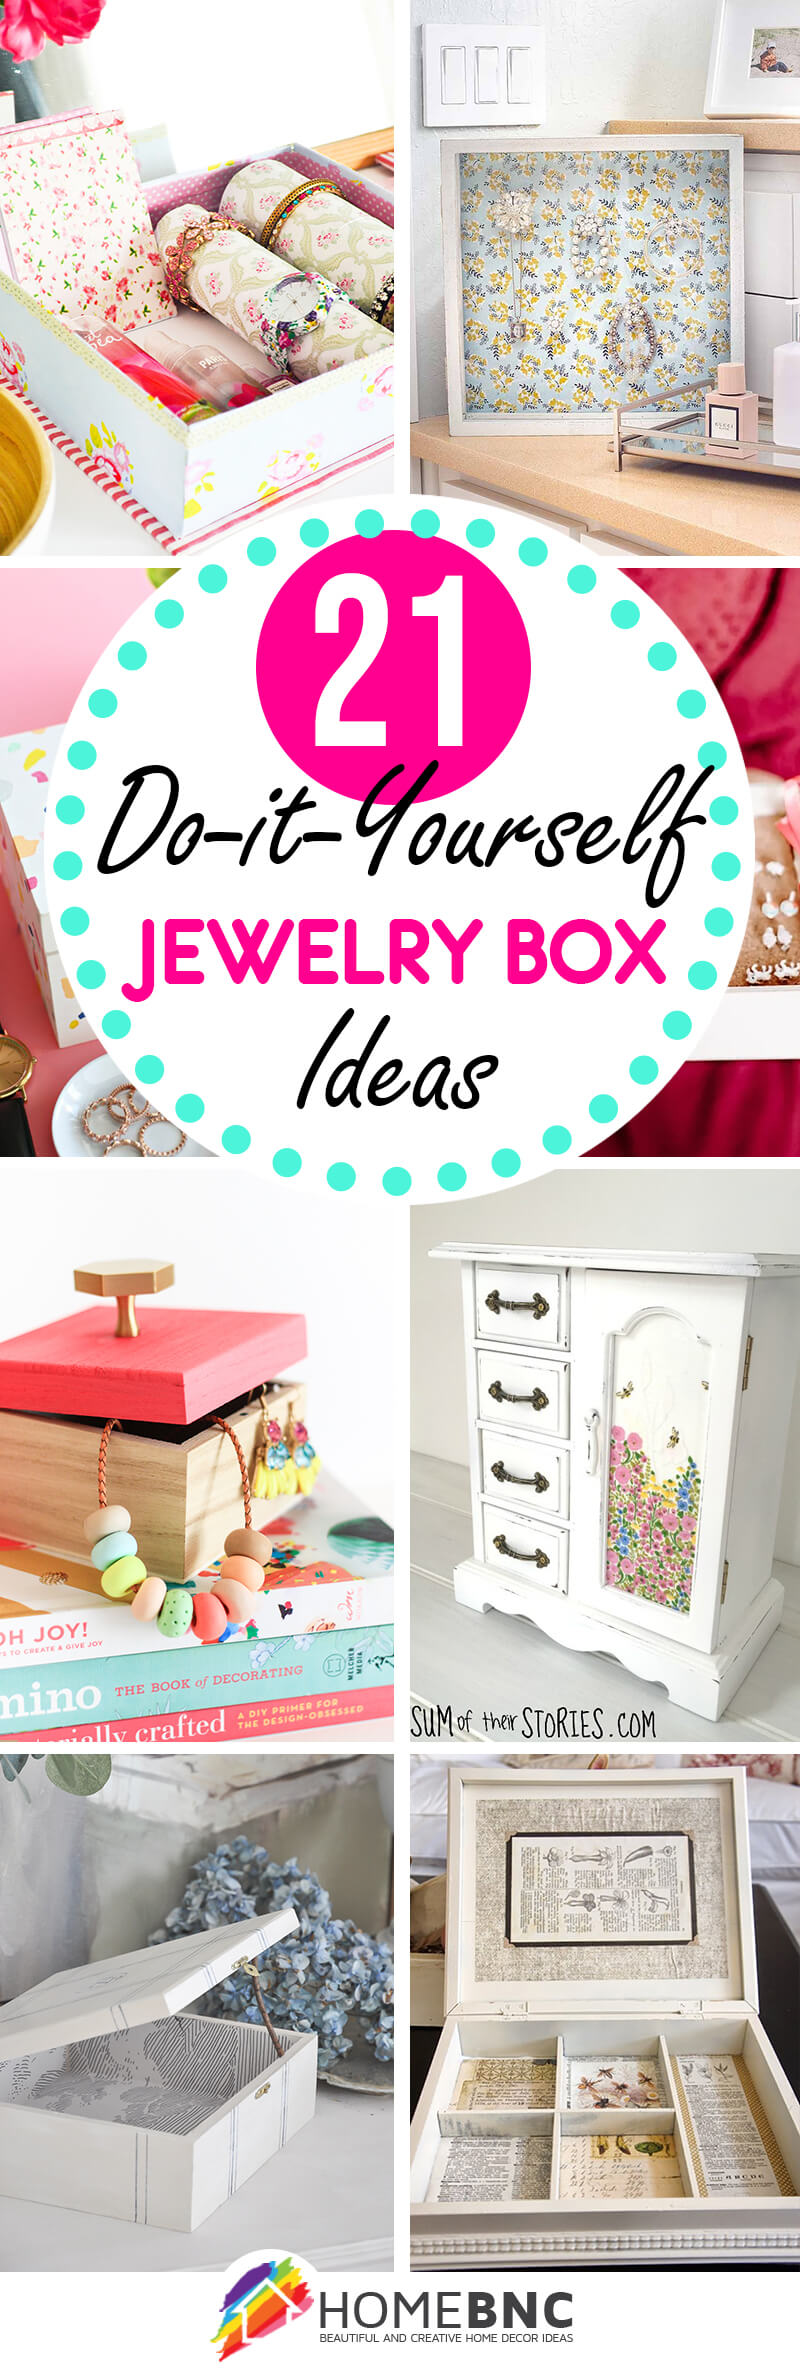
Jewelry Box Projects: Organize and Store Your Treasures in Style

Tired of tangled necklaces and misplaced earrings? Transform your jewelry storage from chaotic mess to elegant display with these inspiring DIY jewelry box projects. Whether you prefer a rustic charm or a sleek modern aesthetic, these projects offer a unique blend of functionality and style, allowing you to showcase your beloved pieces while keeping them safe and organized. Get ready to unleash your creativity and enjoy the satisfying process of crafting the perfect jewelry storage solution tailored to your taste.

Repurposing for a Unique Touch

Don't underestimate the potential of repurposed items! Give old cigar boxes, vintage wooden crates, or even pretty tea tins a new life as stunning jewelry organizers. A simple coat of paint, some decoupage, or a layer of textured fabric can completely transform these humble containers. Consider adding dividers made from repurposed cardboard or felt to create compartments for rings, earrings, and bracelets. This method not only offers a sustainable approach to crafting but also adds a unique, vintage feel to your jewelry storage. The inherent imperfections and history of the repurposed material will give your jewelry box a one-of-a-kind character.

Adding Personal Touches

Personalize your repurposed jewelry box by adding embellishments that reflect your style. Incorporate decorative knobs, vintage buttons, or even small mirrors to add an extra layer of charm. You can also personalize it with your initials or a favorite quote using paint pens or stencils. Don't be afraid to experiment with different textures and patterns. The key is to have fun and let your personality shine through in your unique creation.

Building from Scratch: A Customizable Approach

For complete control over the design and size of your jewelry box, building one from scratch offers unparalleled customization. Choose from a variety of materials, including wood, fabric, or even upcycled materials like pallets. A simple wooden box can be enhanced with decorative hinges and latches, creating a sophisticated and functional piece. Consider incorporating compartments of varying sizes to accommodate different types of jewelry. This allows you to customize your jewelry box to match the size and shape of your collection, ensuring everything has its designated place.

Essential Tools and Materials

Before you begin, gather your necessary tools and materials. This might include:

  • Wood (for wooden boxes)
  • Fabric (for fabric-covered boxes)
  • Saw (for cutting wood)
  • Glue
  • Screws and hinges
  • Paint and brushes
  • Decorative elements (buttons, knobs, etc.)
  • Measuring tape and pencil

Creative Storage Solutions Within Your Box

Maximize your jewelry box's storage capacity with clever interior designs. Use fabric-covered dividers to separate necklaces and prevent tangling. Employ small trays or compartments for rings and earrings, ensuring easy access and visibility. Consider adding a small mirror to the inside of the lid for convenient application of makeup or jewelry adjustment. Even repurposed items like egg cartons or spice racks can find a new purpose as ingenious storage solutions within your custom-designed box, offering a unique and functional touch.

Protecting Your Precious Pieces

Protecting your jewelry is paramount. Line your jewelry box with soft fabric like velvet or felt to prevent scratches and tarnish. This added layer of protection will keep your jewelry looking its best for years to come. For particularly delicate pieces, consider using individual fabric pouches or felt inserts for extra security.

DIY Key Racks with Customizable Hooks and Features for Extra Appeal

DIY Key Racks with Customizable Hooks and Features for Extra Appeal

DIY Key Racks with Customizable Hooks and Features for Extra Appeal

Tired of losing your keys in the abyss of your entryway? A key rack can be a lifesaver, providing a designated spot for your keys and other small items. But why settle for a boring, generic key rack when you can create a personalized masterpiece? This article will guide you through building a DIY key rack with customizable hooks and features, adding a touch of flair to your home while keeping your keys organized.

Choosing Your Base

The foundation of your key rack sets the tone for its style. Opt for a material that resonates with your home's aesthetic and suits your desired functionality.

Wood

Wood is a timeless choice, offering warmth and versatility. You can use reclaimed wood for a rustic look or opt for polished wood for a modern feel. Explore different wood types like oak, pine, or maple to match your preference.

Metal

Metal provides a sleek, industrial vibe. Choose from various metals like steel, iron, or copper. A metal base can be painted or left bare to complement your home's color scheme.

Upcycled Materials

Get creative by using salvaged items like an old window frame or a vintage toolbox. Upcycled materials add character and sustainability to your project.

Planning the Hooks

Customizable hooks are the stars of the show! Choose from a wide range of materials, sizes, and shapes to suit your needs and style.

Hook Materials

Consider using:

  • Metal hooks: These offer durability and a modern aesthetic.
  • Wooden hooks: Bring a natural, rustic charm to your key rack.
  • Ceramic hooks: Add a touch of whimsy and personality.
  • Upcycled hooks: Transform vintage door knobs, coat hooks, or even silverware into unique hooks.

Hook Placement and Arrangement

Think about the items you'll be hanging on your rack. Arrange the hooks to accommodate your needs. For instance, you might want dedicated hooks for keys, sunglasses, dog leashes, and mail.

Adding Extra Appeal

Boost the appeal of your key rack with customizable features that enhance its functionality and aesthetics.

Storage compartments

Incorporate small shelves or drawers for storing loose change, mail, or other small items. These compartments can be built into the base or added separately.

Lighting

Install small lights like LED strips or a decorative bulb to illuminate the rack and create a welcoming ambiance.

Decorative elements

Add decorative touches such as stencils, paint, or fabric to personalize your key rack and match your decor. You can even incorporate family photos or artwork to make it truly unique.

Getting Started

Once you have your materials and plan in place, you're ready to build! For woodworking projects, use a saw, drill, sandpaper, and wood glue. Metal projects might require welding, cutting, and drilling. Remember to measure carefully and take your time to ensure a well-crafted result.

Conclusion

A DIY key rack offers endless possibilities for customization and personalization. With a little creativity and effort, you can craft a functional and stylish piece that reflects your personality and adds character to your home. Enjoy the process and have fun creating your own one-of-a-kind key rack!

Tuesday, 19 November 2024

DIY Wooden Ornaments for Your Christmas Tree

DIY Wooden Ornaments for Your Christmas Tree

DIY Wooden Ornaments for Your Christmas Tree: Add Rustic Charm to Your Holiday Decor

Looking for a way to personalize your Christmas tree and add a touch of rustic charm? Look no further than DIY wooden ornaments! These simple yet elegant decorations are a delightful way to express your creativity and bring warmth to your holiday decor. You can create ornaments that reflect your personal style, from whimsical animal shapes to elegant snowflakes, and even personalize them with names, dates, or special messages.

Gathering Your Supplies

The beauty of DIY wooden ornaments lies in their simplicity. You don't need a lot of fancy equipment or materials. Start by gathering these essential supplies:

  • Wooden cutouts: These come in various shapes and sizes, from classic circles and stars to unique animal silhouettes. You can find them at craft stores, online retailers, or even reuse scrap wood.
  • Paint: Choose acrylic paints in your favorite colors for a bright and cheerful look. You can also experiment with metallic paints for a touch of glamour.
  • Paintbrushes: Select a variety of brush sizes to create details and cover larger areas.
  • Twine or ribbon: This will be used to hang your ornaments.
  • Optional embellishments: Let your creativity flow! Consider adding glitter, sequins, buttons, or other decorative elements to make your ornaments truly unique.

Creating Your Wooden Ornaments

Now that you have your supplies, it's time to unleash your creativity! Here's a step-by-step guide to creating your wooden ornaments:

Step 1: Prep Your Wooden Cutouts

Start by sanding your wooden cutouts to create a smooth surface for painting. This helps prevent the paint from clumping or peeling. You can use sandpaper or a sanding block to smooth out any rough edges.

Step 2: Get Creative with Paint

Now comes the fun part! Paint your wooden cutouts with your chosen colors. If you're using multiple colors, let each layer dry completely before applying the next. For a rustic look, apply a thin layer of paint and let some of the wood grain show through. If you're going for a more polished look, cover the wood completely with paint.

Step 3: Add Embellishments

This is where you can truly personalize your ornaments. Add glitter, sequins, buttons, or other decorative elements to create your desired look. Be creative and experiment with different textures and colors.

Step 4: Attach Hanging Strings

Use your twine or ribbon to create a loop for hanging your ornaments. You can tie a simple knot or use a hole punch to create a hanging hole. Add a decorative touch by using a piece of ribbon that complements the ornament's colors.

Displaying Your Ornaments

Once your DIY wooden ornaments are complete, admire your handiwork! Hang them on your Christmas tree, place them on your mantel, or use them to decorate your gift packages. These handcrafted treasures will add a special touch to your holiday decor and bring warmth to your home.

Conclusion

Creating DIY wooden ornaments is a fun and rewarding activity that allows you to express your creativity and personalize your holiday decor. With a little time and effort, you can create beautiful and unique ornaments that will be treasured for years to come. So gather your supplies, let your imagination run wild, and create some magical Christmas decorations!

Monday, 18 November 2024

How to Cut Dado Joints with a Circular Saw

How to Cut Dado Joints with a Circular Saw

Cutting Dado Joints with a Circular Saw

Dado joints are a classic woodworking technique that creates a strong, flush connection between two pieces of wood. They are often used to create shelves, drawers, and other furniture components. While dado joints are traditionally cut with a table saw, you can achieve precise and professional results using a circular saw with a little planning and attention to detail.

Preparation is Key

Before you even pick up your saw, there are a few essential steps to ensure a successful dado joint. First, select the correct blade for the job. A dado blade set, consisting of two outer blades and a center blade, is specifically designed for cutting dados. Alternatively, you can use a standard saw blade with a thin kerf for precise cuts. Next, accurately mark the location of the dado on your workpiece. Use a pencil, combination square, and a straightedge to draw clear lines.

Setting Up Your Workpiece

To achieve perfectly aligned dado joints, you'll need to secure your workpiece firmly. Clamping it to a workbench or using a sawhorse with a piece of plywood as a stable base is recommended. Ensure your workpiece is flat and level to prevent any inconsistencies in your cuts.

Making the Cuts

With your workpiece securely in place, you're ready to start cutting. Follow these steps:

  1. Position the circular saw along the marked line for the dado's depth.
  2. Using a guide rail or straightedge, set the saw to the desired depth. For a clean cut, ensure the guide rail is flush with the workpiece.
  3. Make the first cut, slowly and steadily guiding the saw along the line.
  4. Without lifting the saw, adjust its position to the width of the dado, and make your second cut parallel to the first.
  5. Carefully remove the waste wood from the dado, ensuring not to damage the edges.
  6. If required, use a chisel or router to clean up any rough edges.

Tips for Success

Here are a few extra tips to help you achieve perfectly cut dado joints:

  1. Use a guide rail: For precise and straight cuts, consider using a guide rail with your circular saw. This will help you keep your cuts consistent and prevent any wandering.
  2. Practice on scrap wood: Familiarize yourself with your circular saw and the techniques of dado cutting by practicing on scrap wood before cutting your final project.
  3. Be mindful of blade depth: Make sure your saw blade is set to the correct depth for the dado. A shallow cut won't result in a strong joint, while an overly deep cut can damage the workpiece.
  4. Go slowly: Avoid rushing your cuts. Slowly and steadily guide the circular saw to ensure clean and accurate results.

Cutting dado joints with a circular saw can be a great alternative to using a table saw. With the right preparation, tools, and techniques, you can achieve strong, precise joints that will enhance your woodworking projects.

Wednesday, 13 November 2024

How to Create Dado Joints for Perfect Shelf Installations

How to Create Dado Joints for Perfect Shelf Installations

How to Create Dado Joints for Perfect Shelf Installations

Hey there, fellow DIYer! Ever looked at a wobbly shelf and thought, "There has to be a better way?" Well, there is! Enter the dado joint, a simple yet powerful woodworking technique that'll give your shelves the strength and stability they deserve.

Think of a dado joint as a "slot" cut into the side of a piece of wood. This slot is precisely sized to perfectly accommodate the thickness of your shelf. When you slip the shelf into the dado, you're creating a strong, secure connection that's much more robust than a simple nail or screw.

Why Choose Dado Joints?

Okay, so you're convinced dado joints are cool. But why are they so great, you ask? Let's break down the benefits:

  • Unbeatable Strength: Dado joints are designed to distribute weight evenly across the shelf, minimizing sagging and wobbles. Think of it like a sturdy foundation for your shelves!
  • Sleek Aesthetics: Unlike visible screws or nails, dado joints create a seamless, clean look. Your shelves will blend seamlessly with the surrounding structure, making your projects look more polished and professional.
  • Long-Lasting Durability: A well-made dado joint is incredibly strong and durable, ensuring your shelves stay stable and secure for years to come.
  • Easy to Assemble and Disassemble: While dado joints are strong, they're also relatively easy to assemble and disassemble. If you need to adjust your shelf setup or make changes, you can easily remove the shelves without damaging the structure.

Tools You'll Need

Before you jump into creating dado joints, make sure you've got the right tools for the job. Here's a list of essentials:

  • Table Saw: A table saw is the go-to tool for making precise dado cuts. It provides the control and accuracy you need for a perfect fit.
  • Dado Stack: This specialized set of saw blades creates the groove (or dado) in your wood. Look for a dado stack with blades that offer the desired width and depth for your project.
  • Circular Saw: If you don't have a table saw, a circular saw can also be used for creating dados. Just be sure to use a guide to ensure straight and accurate cuts.
  • Router: For more intricate dados or smaller projects, a router can be a great option. You'll need a dado-cutting router bit and a router table to make the cuts.
  • Measuring Tape: Accuracy is key! Use a measuring tape to carefully determine the dimensions of your dado and the thickness of your shelf.
  • Pencil: For marking your cut lines on the wood.
  • Safety Gear: Always wear safety glasses, hearing protection, and a dust mask when working with power tools.

Step-by-Step Guide to Making Dado Joints

Ready to dive in? Let's create those perfect dado joints!

1. Prepare Your Wood

  • Choose the right wood: Consider the type of wood you'll be using for both the shelf and the sides where you'll be creating the dados. Make sure the wood is stable and suitable for your project.
  • Measure twice, cut once: Carefully measure the width of your shelf and mark the corresponding width on the sides where you'll be creating the dado. You'll need to cut a groove that's exactly the width of your shelf.
  • Cut to size: Cut the pieces of wood that will form the sides of your shelf unit to the desired length. Ensure all cuts are clean and precise.

2. Setting Up Your Table Saw

If you're using a table saw, set it up for safety and accuracy:

  • Install your dado stack: Follow the manufacturer's instructions for installing your dado stack on the table saw.
  • Adjust the blade height: Set the blade height to the thickness of your shelf. Remember, the dado needs to be deep enough to hold your shelf securely.
  • Adjust the fence: Set the fence distance to the desired width of your dado (the width of your shelf). Make sure the fence is locked and secure.
  • Use a push stick: A push stick will help you safely guide the wood through the table saw and prevent your fingers from coming near the blade.

3. Cutting the Dado

Now for the fun part!

  • Make the first cut: Position the wood against the fence, making sure your marked line is aligned with the blade. Use a slow, controlled motion to guide the wood through the saw. It's essential to be precise at this step, as this initial cut determines the entire dado.
  • Make the second cut: Once you've completed the first cut, flip the wood over and repeat the process on the opposite side. This will create the groove for your shelf.
  • Clean up the edges: After making the dado cuts, use sandpaper to smooth out any rough edges and ensure a smooth surface for your shelf to rest on.

4. Assembling Your Shelf

Finally, the moment of truth. You've created your dado joints, now let's assemble the shelf!

  • Align your pieces: Carefully place your shelf into the dado groove you've created. Ensure it fits snugly and sits flush with the sides of the shelf unit.
  • Secure the shelf: To ensure your shelf stays secure, you can use wood glue to create a strong bond between the shelf and the sides. If needed, you can also reinforce the connection with wood screws from the underside, but make sure they're counter-sunk to maintain a clean look.

Tips and Tricks

Here are a few extra tips to help you create professional-looking dado joints:

  • Practice: If you're new to dado joints, practice on scrap wood first. Get a feel for the tool and the process before tackling your project.
  • Go slow and steady: Don't rush the process! Take your time, especially when making the initial cuts on your table saw.
  • Clean your tools: Keep your dado stack and table saw clean and free of sawdust. This ensures smooth and accurate cuts.
  • Check your fit: Before you start cutting, test your dado stack to make sure it creates a groove that's the exact width of your shelf.
  • Use a miter gauge: A miter gauge will help you make precise and consistent cuts on your table saw. It'll keep your dado straight and symmetrical.
  • Consider a dado jig: If you need to create multiple dados in different locations, a dado jig can help you make quick and easy cuts. These jigs provide accurate alignment and help prevent mistakes.

Beyond Shelves: Expanding Your Dado Joint Skills

Once you've mastered the basics of dado joints, you can use this versatile technique for a wide range of woodworking projects! Here are a few ideas:

  • Drawer Construction: Create strong and sturdy drawer boxes with dado joints that hold the sides together.
  • Table Tops: Create a robust and durable table top by joining planks together with dado joints.
  • Picture Frames: Give your picture frames a professional look with dado joints that hold the frame pieces together.
  • Custom Furniture: Use dado joints to construct intricate furniture pieces, like bookcases, cabinets, and desks. The possibilities are endless!

So there you have it! Dado joints are a game-changer for building strong and beautiful shelves and other woodworking projects. Don't be afraid to experiment and have fun with it. You'll be amazed at what you can create with this versatile woodworking technique!

Tuesday, 12 November 2024

How to Make a Firewood Rack from Pallets for Outdoor Storage

How to Make a Firewood Rack from Pallets for Outdoor Storage

Build a Firewood Rack from Pallets for Outdoor Storage

Winter is coming, and you're probably thinking about getting your fireplace ready. But where will you store all that firewood? Don't worry, you don't need to buy an expensive rack. With a few simple tools and some leftover pallets, you can easily build a sturdy and stylish firewood rack yourself. Building a firewood rack from pallets is an excellent way to save money and upcycle materials, and it's an excellent project for beginners.

Here's what you'll need to get started:

Materials

  • Two standard pallets (make sure they're sturdy and free of any loose nails or splinters)
  • A circular saw or hand saw
  • A drill with a drill bit for pilot holes
  • Wood screws (at least 2-inch long)
  • A level
  • A tape measure
  • Safety glasses
  • Work gloves

Instructions

Step 1: Prepare the Pallets

Start by cleaning the pallets with a wire brush or sandpaper to remove any dirt or debris. Then, check for any loose nails or splinters and remove them with a hammer and pliers. If you're working with treated pallets, be sure to wear a mask to avoid inhaling any dust or chemicals.

Step 2: Cut the Pallets

Using a circular saw or handsaw, cut the pallets in half lengthwise. This will create two shorter pieces that will form the sides of your firewood rack. Be sure to wear safety glasses and work gloves during this step. Once you've cut the pallets in half, you can lay them flat on the ground with the cut sides facing up.

Step 3: Attach the Pallets

Use screws to attach the two pallet halves together, creating a rectangular frame. You will want to make sure the cut sides of the pallet are facing the same direction. Start by drilling pilot holes using your drill. This will prevent the wood from splitting when you screw it in. Then, secure the pallets together with screws, spacing them evenly along the edges of the frame.

Step 4: Add Supports (Optional)

You can add more support to your firewood rack by attaching additional pieces of wood to the inside of the frame. You can use pieces of pallet wood or purchase some 2x4s from your local lumber store. This will help to prevent the rack from sagging under the weight of the firewood.

Step 5: Sand and Stain (Optional)

Once your firewood rack is assembled, you can sand it smooth and apply a stain or sealant to protect it from the elements. This step is optional, but it can help to make your rack look more polished. You can choose a stain that matches your existing outdoor furniture or the color of your home. If you're using a stain, make sure to follow the manufacturer's instructions carefully.

Step 6: Place Your Firewood Rack

After the stain has dried, your firewood rack is ready to be placed in your desired location. Choose a dry spot that is sheltered from the rain and snow. You may want to consider placing the rack on a piece of landscaping fabric or a few bricks to keep the wood off the ground and prevent it from rotting.

And that's it! You've successfully built a firewood rack from pallets. You can now stack your wood neatly and enjoy your fireplace all winter long. You can also personalize your firewood rack by adding decorative elements such as metal hooks or a custom sign. Get creative and enjoy the warmth of your homemade firewood rack.

Quick and Easy DIY Firewood Rack Plans from Pallets

Quick and Easy DIY Firewood Rack Plans from Pallets

Quick and Easy DIY Firewood Rack Plans from Pallets: Let’s Get Crackin’!

Listen, let's be honest, a firewood rack is a pretty essential thing to have around the house, especially if you're a fire enthusiast like me. And who doesn't love a good fire, right? It’s cozy, it’s inviting, and it makes you feel all warm and fuzzy inside (literally). But, let’s face it, buying one can be a real hit to the wallet. I'm all about saving money and getting creative, and that’s where pallets come in.

You know, those trusty wooden platforms that haul things all over the place. I always thought they were destined for the landfill, but let me tell ya, they're just waiting for their second chance. And guess what? A pallet is the perfect starting point for a DIY firewood rack. Not only is it affordable, but it's eco-friendly too!

So, grab your tools, put on your DIY hat, and let’s get this firewood rack party started!

Gather Your Supplies: What You’ll Need

First things first, we gotta make sure we have everything we need. It's like a campfire: no matches, no fire. You gotta have your supplies, right?

  • One sturdy pallet (make sure it's free of any nails sticking out)
  • Saw (circular saw or handsaw)
  • Measuring tape
  • Screwdriver or drill
  • Screws or nails
  • Safety goggles
  • Work gloves
  • Optional: Sandpaper, wood stain or paint

Get Ready, Set, Measure: Planning Your Firewood Rack

Before you start sawing and drilling, take a minute to plan your rack. It's like setting up a tent: you gotta know where the poles go!

Deconstructing the Pallet

You'll likely have to take apart your pallet to create the structure you want. Some pallets are made with a bunch of slats, but others have bigger boards. The size and shape will dictate how you cut it.

Choosing Your Style

Now, this is where you get to unleash your inner designer! What kind of firewood rack do you want? Do you want it to be a classic, simple design, or something more elaborate? Here are a couple of ideas:

  • Classic A-frame: This is a traditional and reliable design that uses two angled pieces to support the wood. It's super easy to put together!
  • Stacked or tiered: These designs use multiple horizontal levels to store firewood, giving you a vertical stacking solution.
  • Lean-to: A basic design with two upright supports and a single horizontal beam across the top to create a simple leaning structure.

Once you’ve chosen your style, measure the pallet, mark your cuts, and get ready to saw!

Cutting Your Pallet to Perfection

Remember, safety first! Safety goggles and gloves are essential when working with wood.

Making the Cuts

Carefully measure your pallet and make your cuts using a circular saw or handsaw. You'll need to remove some sections to make your rack. If you have big boards, cut them down to create the horizontal and vertical supports.

Take your time and make sure the cuts are clean and precise. After all, you don’t want your rack to fall apart in the middle of the night when you’re grabbing wood for your fire!

Building Your Firewood Rack: Time for Construction

Now for the fun part! Time to put your masterpiece together.

Assembling the Structure

Depending on your design, you’ll likely need to create some supporting angles. For the A-frame design, cut two angled supports from the pallet wood. For other designs, you might need to cut horizontal beams and supports.

Once you have your pieces, use screws or nails to secure them together. Make sure the screws are long enough to go through the wood and into the next piece. You can use a drill to pre-drill holes if the wood is hard, making it easier to screw the pieces together.

Attaching the Pallet to the Base

If you’re using a whole pallet, you'll likely want to attach it to a base to create a more stable structure. You can use the remaining pallet boards to create a base or use scrap lumber you have lying around.

Finishing Touches: Make Your Rack Shine

Alright, your firewood rack is practically ready. Now, let's add a little pizzazz!

Sanding and Finishing

If you want a smooth finish, give your rack a good sanding. You can use different grits of sandpaper to get the level of smoothness you want.

Now, here comes the fun part! You can stain, paint, or leave it natural. Consider adding a wood stain to enhance the natural beauty of the wood or paint it a color that matches your outdoor space.

Accessorizing

Want to take your rack to the next level? Add some decorative elements! You can create a custom design using wood, metal, or rope. Get creative!

And There You Have It, A DIY Firewood Rack Made From Pallets!

Congratulations, you've just created a beautiful and practical firewood rack â€" and you saved a ton of money in the process! Now you can proudly store all your firewood in style. Go on, start a fire, and enjoy the warmth of your hard work.

How to Create a Pallet Firewood Rack for Indoor or Outdoor Use

How to Create a Pallet Firewood Rack for Indoor or Outdoor Use

Creating a Pallet Firewood Rack for Indoor or Outdoor Use: A Comprehensive Guide

Pallet wood, often discarded as waste, offers a sustainable and aesthetically pleasing material for crafting practical furniture. One such project that seamlessly blends functionality and rustic charm is a pallet firewood rack. This guide provides a step-by-step breakdown of creating a durable and visually appealing pallet firewood rack suitable for both indoor and outdoor applications.

Choosing the Right Pallet

The foundation of your firewood rack lies in selecting the appropriate pallet. Consider these factors:

Type of Pallet

  • Heat-treated pallets: These are safe for indoor use as they have been treated to eliminate pests and pathogens. They are typically marked with an "HT" stamp.
  • Chemically-treated pallets: While cheaper, these pallets may contain harmful chemicals and are not recommended for indoor use. They are marked with an "MB" stamp.

Size and Condition

Ensure the pallet is structurally sound, free of rot, and large enough to accommodate your firewood needs. Pallets with wider slats and sturdier construction are ideal for a firewood rack.

Aesthetic Considerations

Choose a pallet with a natural, rustic finish that complements your surroundings. If using the rack indoors, consider sanding down rough edges for a smoother look.

Tools and Materials

Before embarking on the construction, gather the following tools and materials:

  • Pallet (heat-treated)
  • Safety glasses
  • Work gloves
  • Measuring tape
  • Pencil or marker
  • Saw (circular or hand saw)
  • Hammer
  • Screwdriver or drill
  • Wood screws (2-inch or longer)
  • Sandpaper (optional, for finishing)
  • Wood stain or paint (optional, for finishing)

Step-by-Step Construction

Follow these steps to create your pallet firewood rack:

Step 1: Preparation

  • Clean the pallet thoroughly, removing any debris or loose nails.
  • Inspect for any damaged slats and replace or reinforce them as needed.
  • If desired, sand down the pallet's surface to achieve a smoother finish.

Step 2: Designing the Rack Structure

There are several design options for your pallet firewood rack, each with its own benefits:

  • Single-level rack: The simplest design, requiring minimal modification to the original pallet. Ideal for smaller firewood quantities.
  • Stacked rack: Create multiple levels by adding additional pallet slats or wooden planks. Offers greater storage capacity.
  • Wall-mounted rack: Secure the pallet to the wall using brackets, maximizing floor space.
  • Freestanding rack: Use multiple pallets or additional supports to create a standalone rack.

Step 3: Cutting and Attaching Slats (Optional)

If creating a stacked or multi-level rack, you'll need to add additional slats. Measure and cut the desired length of slats using your saw. Secure them to the existing pallet slats using wood screws, ensuring stability and a secure fit.

Step 4: Adding Supports (Optional)

For a more robust rack, consider adding supporting beams or legs. Use wood screws to attach them securely to the pallet, creating a stronger framework.

Step 5: Finishing Touches

  • Apply wood stain or paint to enhance the rack's aesthetic appeal and protect the wood from moisture or weathering. Choose a finish that complements your surroundings.
  • Sand down any rough edges to create a smooth and finished look.
  • If using the rack outdoors, consider applying a sealant or weather-resistant finish to protect it from the elements.

Placement and Use

Once constructed, position your pallet firewood rack in a convenient and aesthetically pleasing location. Consider these factors:

  • Access: Place the rack near a fireplace or wood-burning stove for easy access to firewood.
  • Ventilation: Ensure adequate airflow around the rack to prevent moisture buildup and mildew formation, especially if used indoors.
  • Aesthetics: Choose a location where the rack blends seamlessly with the surrounding decor.

Safety Considerations

Always prioritize safety when using a pallet firewood rack:

  • Ensure the rack is sturdy and stable, avoiding over-loading.
  • Store firewood properly, leaving space for air circulation to prevent fires.
  • Keep the rack away from heat sources, such as fireplaces or stoves.
  • Never leave firewood unattended, especially if children are present.

Conclusion

Creating a pallet firewood rack is a rewarding DIY project that combines sustainability with practical functionality. By following these steps, you can transform salvaged pallet wood into a stylish and practical storage solution for your firewood. Remember to prioritize safety and choose a design that complements your needs and aesthetics.

Custom Squirrel Box Plans for Small Gardens

Custom Squirrel Box Plans for Small Gardens

Custom Squirrel Box Plans for Small Gardens: A Delightful DIY Project

Hey there, fellow nature lovers! Do you have a small garden but dream of seeing adorable squirrels scampering around? Well, you're in luck! You can create a cozy little haven for these furry friends right in your backyard, even if space is limited. This guide will take you through the exciting process of building a custom squirrel box, tailored to your garden's needs.

Why Build a Squirrel Box?

Squirrels are a joy to watch, their playful antics and bushy tails adding a touch of charm to any garden. Beyond entertainment, they play a vital role in the ecosystem, helping to disperse seeds, control insect populations, and even aid in pollination.

By building a squirrel box, you're not only providing a safe shelter for these creatures but also contributing to their well-being. You'll be creating a haven where they can raise their young, escape predators, and find refuge during harsh weather conditions.

Planning Your Squirrel Box: Tailoring to Your Garden

Before you grab your tools, it's essential to carefully plan your squirrel box design. Consider these factors:

1. Space Constraints

You have a small garden, so let's embrace those limitations and turn them into an advantage. You'll want to choose a design that fits comfortably in your available space. Consider placing your squirrel box against a wall, fence, or even on a tree trunk if possible.

2. Material Selection

For a long-lasting and weather-resistant box, opt for cedar, redwood, or pressure-treated lumber. These wood types are naturally resistant to rot and decay, ensuring your squirrel box can withstand the elements for years to come.

3. Entry Size and Placement

Squirrels need an entry hole that is large enough for them to access the box easily but small enough to prevent larger animals from entering. A 4-inch diameter hole is ideal, and place it high up on the front of the box to prevent access from ground predators.

4. Ventilation and Drainage

Squirrels are sensitive to humidity and drafts. Incorporate ventilation holes on the sides of the box to allow for proper air circulation. A slight downward tilt to the bottom of the box will help with drainage, preventing moisture build-up and creating a healthier environment for your furry tenants.

Squirrel Box Design: A Step-by-Step Guide

Ready to get your hands dirty? Let's dive into the building process!

1. Cutting the Wood

First, cut your wood to the following dimensions (modify these based on your preferred box size):

  • Two side panels: 12 inches x 8 inches
  • Two end panels: 12 inches x 8 inches
  • One bottom panel: 12 inches x 8 inches
  • One roof panel: 14 inches x 10 inches
  • One front panel: 12 inches x 8 inches (with a 4-inch diameter hole cut near the top)

2. Assembling the Box

Now, let's put the pieces together!

  • Attach the two side panels and two end panels to the bottom panel using wood glue and screws. Make sure the joints are flush and secure.
  • Attach the front panel with the entry hole to the front of the box, ensuring the hole is high up.
  • Cut a 1/4-inch overhang on the roof panel and secure it to the box with hinges. This will allow you to easily access the box for cleaning and maintenance.

3. Adding Finishing Touches

Let's make your squirrel box extra inviting!

  • Drill ventilation holes on the sides of the box, ensuring they are high enough to prevent water entry.
  • Apply a weather-resistant sealant or paint to the exterior of the box to protect it from the elements. Choose a color that blends seamlessly with your garden.
  • Create a sturdy base for your squirrel box using a piece of plywood or a sturdy brick. This will elevate the box off the ground and provide additional protection from moisture.

Placing Your Squirrel Box: Finding the Perfect Spot

Now that your squirrel box is ready, it's time to find its perfect home in your garden. Remember, safety and accessibility are key:

  • High and Secure: Mount the box at least 6 feet above the ground, out of reach of predators. This might mean attaching it to a tree trunk or a sturdy fence post.
  • Shelter from the Elements: Place the box under a leafy canopy, offering protection from direct sun and rain.
  • Close to Resources: Consider placing the box near a source of water, food, and trees for nesting material.

Squirrels Move In! Tips for Success

You've created a cozy abode, and now you're waiting for your furry tenants to arrive. Here are some tips for attracting squirrels to your box:

  • Patience is Key: Squirrels may take some time to discover and settle into their new home. It could be a few weeks or even months. Be patient!
  • Natural Enticements: Place a few branches or leaves near the entrance to encourage exploration. Squirrels love to climb and explore, so these natural accents will pique their interest.
  • Food for Thought: You can gently encourage their arrival by placing small amounts of food near the box, but avoid overfeeding. Squirrels should find their own food sources in your garden.

Maintaining Your Squirrel Box: A Love Letter to Your Tenants

Keep your squirrel box in tip-top shape by giving it regular maintenance.

  • Cleaning Up: Clean the box once or twice a year, especially after the nesting season, to remove old nesting material and any debris.
  • A Fresh Coat: Repaint or re-seal the exterior of the box every few years to maintain its weather resistance and protect the wood.
  • Check for Damage: Regularly inspect the box for signs of damage, wear and tear, or any potential hazards. Fix any issues promptly to ensure the safety of your furry residents.

A Small Space, Big Impact

Building a custom squirrel box is a rewarding DIY project that not only enhances your small garden but also makes a positive impact on the wildlife in your community. With a little creativity and effort, you can provide a safe and cozy haven for these charming creatures. So grab your tools, get your hands dirty, and enjoy the delightful company of squirrels right in your own backyard!

Complete diy guide to making a custom wooden clock

Complete diy guide to making a custom wooden clock

A Comprehensive Guide to Crafting a Custom Wooden Clock

Embark on a rewarding DIY project by constructing a unique wooden clock, a timeless and elegant addition to your home décor. This guide provides step-by-step instructions, encompassing material selection, design considerations, and assembly techniques, empowering you to create a truly personalized masterpiece.

Materials and Tools

Before embarking on your clock-making journey, ensure you have the necessary materials and tools. This list serves as a comprehensive starting point, with the option to adapt based on your specific design and preferences.

Wood

The choice of wood significantly influences the final aesthetic and durability of your clock. Consider these factors:

  • Species: Opt for hardwoods like oak, maple, or walnut for their resilience and attractive grain patterns. Softwoods like pine or cedar offer a lighter, more rustic appearance.
  • Thickness: Aim for wood that is at least ½ inch thick to provide structural integrity.
  • Dimensions: Determine the size and shape of your clock face, accounting for the clock mechanism and any additional embellishments.

Clock Mechanism

The clock mechanism dictates the functionality and style of your creation. Popular options include:

  • Quartz Movement: Affordable, quiet, and accurate, perfect for beginners.
  • Pendulum Movement: Offers a classic, traditional aesthetic and a gentle ticking sound.
  • Gear Train Movement: Provides a more intricate, mechanical feel and a distinctive ticking sound.

Additional Materials

  • Clock Hands: Select hands that complement the style and size of your clock.
  • Numbers or Markers: Choose numerals, Roman numerals, or decorative markers to indicate the hours.
  • Wood Glue: Use a high-quality wood glue for secure bonding.
  • Wood Stain or Paint: Enhance the natural beauty of the wood or create a custom color scheme.
  • Clear Coat: Protect the finish and enhance durability with a sealant.
  • Sandpaper: Sand the wood to achieve a smooth and polished surface.
  • Measuring Tape and Pencil: For precise measurements and marking.
  • Saw: For cutting the wood to size.
  • Drill: To create holes for the clock mechanism and hands.
  • Screwdriver: To secure the clock mechanism and hands.
  • Clamps: To hold pieces together while the glue dries.

Designing Your Clock

The design process is where your creativity comes to life. Consider these elements:

Shape and Size

Determine the shape of your clock face. Square, rectangular, round, or even whimsical shapes are all viable options. The size should be proportional to the overall design and the room where it will be displayed.

Clock Mechanism

The clock mechanism's size and shape will influence the overall design. Make sure you have the right mechanism to suit your desired aesthetic and functional requirements.

Numbers and Markers

Choose a number or marker style that complements the overall design. Roman numerals, Arabic numerals, or even decorative markers can add a unique touch.

Finishing Touches

Consider adding decorative elements to enhance the visual appeal of your clock. These can include:

  • Inlays: Intricate wood or metal inlays can create a captivating pattern.
  • Carvings: Add detail and texture with carvings.
  • Paint: Use paint to highlight specific areas or create a vibrant backdrop.

Construction Process

Now, let's delve into the step-by-step construction process of your custom wooden clock.

Cutting and Shaping

  • Measure and Mark: Using your design plans, accurately measure and mark the wood for cutting.
  • Cut: Employ a saw to cut the wood to your desired dimensions. Ensure clean, precise cuts for a polished final product.
  • Shape: If you've chosen a non-standard shape, use a jigsaw or bandsaw to create the desired contours.
  • Sand: Smooth all edges and surfaces with sandpaper, starting with coarser grits and gradually progressing to finer ones for a smooth finish.

Assembling the Clock Face

  • Create a Base: If your design requires multiple layers, glue together the pieces using wood glue and clamps.
  • Mark Clock Mechanism Location: Determine the center point for the clock mechanism and mark it clearly on the face.
  • Drill Holes: Drill a pilot hole at the center point, then enlarge it to accommodate the size of the clock mechanism.

Installing the Clock Mechanism

  • Secure the Mechanism: Attach the clock mechanism to the back of the clock face using screws or a nut and bolt provided with the mechanism. Ensure the hands are properly aligned.
  • Test Functionality: Before proceeding, test the clock mechanism to ensure it is working correctly.

Applying Numbers or Markers

  • Placement: Use a compass or protractor to determine the precise positions for the numbers or markers around the clock face. Mark the locations carefully.
  • Attachment: Attach the numbers or markers using wood glue, small nails, or adhesive. Ensure they are secure and evenly spaced.

Finishing the Clock

  • Sanding: Sand the entire clock face to create a smooth, even surface.
  • Staining or Painting: Apply a wood stain or paint to achieve your desired color and finish. Follow the manufacturer's instructions for application and drying times.
  • Clear Coat: Apply a clear coat to protect the finish and enhance durability. Multiple coats can be applied for added protection.

Conclusion

Congratulations! You have successfully crafted a unique and personalized wooden clock. This rewarding DIY project not only provides a decorative centerpiece for your home but also a testament to your craftsmanship and creativity. Embrace the joy of creating something truly special, and let your custom wooden clock become a cherished heirloom for generations to come.

How to design a grill gazebo with a water fountain feature

How to design a grill gazebo with a water fountain feature

Transform Your Backyard Oasis: Building a Grill Gazebo with a Water Fountain Feature

Imagine this: you're grilling up a feast for friends and family, the tantalizing aromas wafting through the air, while the gentle sound of cascading water creates a serene backdrop. This is the magic of a grill gazebo with a water fountain, a unique combination of functionality and aesthetics that can elevate your backyard entertainment to a whole new level.

Building a grill gazebo with a water fountain is a project that requires a bit of planning and effort, but the rewards are immense. It's a project that can be tailored to your specific needs and preferences, allowing you to create a truly personalized outdoor sanctuary.

Planning Your Grill Gazebo with a Water Fountain

Before diving into the construction, it's crucial to have a solid plan in place. This includes determining the size, shape, and style of the gazebo, the type of grill you want to incorporate, and the design of the water fountain. Here's a breakdown of the key considerations:

Size and Shape

The size of your gazebo should be determined by how much space you have available and the number of people you typically entertain. A standard gazebo size is around 10x12 feet, which provides ample room for grilling, dining, and lounging. If you have more space, you could go for a larger gazebo.

The shape is another design choice that can significantly impact the overall look. Square or rectangular gazebos offer a more traditional look, while octagonal or circular gazebos can add a touch of whimsy and spaciousness.

Grill Type

Consider your grilling needs and style when choosing the type of grill. A gas grill offers convenience and quick heating, while a charcoal grill provides that smoky flavor. If you enjoy cooking a variety of dishes, a combination grill with both gas and charcoal options might be the best choice.

Don't forget to factor in the size of the grill and its weight when determining the gazebo's structure. You'll want to ensure the gazebo can support the weight and provide ample clearance for the grill.

Water Fountain Design

The possibilities are endless when it comes to water fountain designs. You can go for a simple freestanding fountain, an elegant wall-mounted fountain, or a more elaborate cascading fountain with multiple tiers. Consider the overall style of your gazebo and choose a fountain that complements it.

Also, think about the water source. Do you want to connect to your home's water supply or use a self-contained system? If you choose a self-contained system, you'll need to consider the size of the reservoir and how often you need to refill it.

Choosing Materials for Your Gazebo

The materials you choose for your gazebo will dictate its style, durability, and maintenance requirements. Here are some popular options:

  • Wood: This classic material offers warmth and charm. It's relatively easy to work with and can be customized to your liking. However, wood requires regular maintenance to prevent rot and insect infestation.
  • Aluminum: Durable and low-maintenance, aluminum is a good choice for those who want a long-lasting gazebo. It's also lightweight and easy to assemble.
  • Vinyl: Vinyl offers a more budget-friendly option compared to wood or aluminum. It's also very low-maintenance, resistant to moisture and fading.
  • Steel: Steel provides exceptional strength and durability. However, it can be more expensive than other materials and may require painting for rust prevention.

Incorporating a Water Fountain

Now, let's dive into the exciting part: incorporating the water fountain. Here's a step-by-step guide:

Location and Placement

Choose a spot for the fountain within the gazebo where it will be visually appealing and easily accessible. Consider the placement of the water supply and the drainage system. If you're using a self-contained fountain, ensure there's adequate space for the reservoir.

Foundation and Support

If you are building a large or elaborate fountain, you may need to create a solid foundation to support its weight. Consult a professional contractor for expert advice on creating a suitable foundation based on the fountain's size and design.

Water Source and Drainage

Connect the fountain to a reliable water source, either your home's water supply or a self-contained reservoir. Ensure that the water source is properly insulated to prevent freezing in colder climates. Set up a drainage system to collect and direct the water away from the gazebo.

Electrical Connections

If your fountain uses a pump or lighting, you'll need to run electrical wiring to the fountain. Make sure to follow all electrical safety guidelines and consult a qualified electrician for any complex wiring installations.

Adding Finishing Touches

Once the basic structure and fountain are in place, it's time to add those personal touches to make your grill gazebo truly unique. Consider these ideas:

  • Lighting: Add ambient lighting with string lights, lanterns, or solar-powered lights to create a warm and inviting atmosphere.
  • Greenery: Plant climbing vines or flowering shrubs around the gazebo for a touch of natural beauty. Consider using plants that attract pollinators to create a bee-friendly space.
  • Seating and Tables: Choose comfortable and stylish seating options for guests. Consider using a combination of chairs, benches, and a dining table to accommodate different seating preferences.
  • Outdoor Rug: Add an outdoor rug to define the space and add warmth to the area. Choose a rug that complements the color scheme and style of your gazebo.

Maintenance Tips for Your Grill Gazebo with a Water Fountain

To keep your grill gazebo and fountain looking their best, follow these maintenance tips:

  • Regular Cleaning: Clean the gazebo regularly to remove dirt, debris, and spills. Use a mild soap and water solution for cleaning, and avoid harsh chemicals that can damage the materials.
  • Water Fountain Maintenance: Clean the fountain regularly to prevent mineral buildup and algae growth. Change the water frequently and clean the pump and other components as needed. Check the water levels and make sure the pump is functioning properly.
  • Inspect the Structure: Periodically inspect the structure for signs of wear and tear, such as loose bolts, cracks, or rust. Address any issues promptly to prevent further damage.
  • Winterization: In colder climates, it's essential to winterize the fountain to prevent freezing damage. This may involve draining the water, disconnecting the pump, and covering the fountain.

Building a grill gazebo with a water fountain is a rewarding project that can transform your backyard into an oasis of relaxation and entertainment. With careful planning, the right materials, and a touch of creativity, you can create a space that you'll cherish for years to come.

Build a Durable Squirrel Box with Free Plans

Build a Durable Squirrel Box with Free Plans

Build a Durable Squirrel Box with Free Plans

Calling all animal lovers and DIY enthusiasts! Are you tired of watching squirrels wreak havoc on your bird feeders? Do you want to create a haven for these playful creatures, but one that won't fall apart after a few squirrels? Then you need to build a durable squirrel box! This article provides detailed instructions and free plans to guide you through the process of creating a safe and lasting home for your neighborhood squirrels.

Gather Your Materials

Before you start building, you'll need to gather the necessary materials. The good news is, most of them can be found at your local hardware store. Here's a list of what you'll need:

  • Wood: Choose durable and weather-resistant wood like cedar, redwood, or pressure-treated pine. You'll need 1x6 boards for the sides, a 1x8 board for the bottom, and a 1x4 board for the roof.
  • Screws: Use 1-1/2" and 2" screws for attaching the wood pieces.
  • Exterior wood glue: This will help reinforce the joints and make your squirrel box extra strong.
  • Exterior paint or stain (optional): To protect the wood and enhance the appearance of your squirrel box.
  • Heavy-duty wire mesh: This will be used to create an entry hole and keep squirrels safe inside.
  • Metal flashing: To prevent water damage to the roof.
  • Drill and drill bits: For drilling pilot holes and countersinking the screws.
  • Saw: For cutting the wood pieces to size.
  • Measuring tape: For accurate measurements.
  • Clamps: To hold the pieces together while gluing and screwing.
  • Safety glasses and gloves: To protect your eyes and hands.

Choosing the Right Location for Your Squirrel Box

Choosing the right spot for your squirrel box is key to making it attractive to squirrels and ensuring they feel safe and secure.

Here's a list of factors to consider:

  • Height: Mount the box at least 6 feet off the ground to deter predators and provide a good view for the squirrels.
  • Shade: Place the box in a shaded area, especially in hot climates, to keep the interior cool.
  • Shelter: Choose a location near trees or other natural cover for added protection and camouflage.
  • Proximity to a food source: Place the box near your feeders or natural food sources, like trees with nuts or seeds.
  • Accessibility: Ensure the box is easy for you to clean and maintain.

Step-by-Step Instructions

Now that you have your materials and a perfect location, it's time to start building!

Step 1: Cut the Wood

Using your saw and measuring tape, cut the following pieces from your chosen wood:

  • Four 1x6 boards for the sides (12" long)
  • One 1x8 board for the bottom (12" long)
  • Two 1x4 boards for the roof (16" long)

Step 2: Assemble the Sides

Using wood glue and 1-1/2" screws, attach the four 1x6 boards to form the sides of the box. Ensure the corners are square and the sides are flush.

Step 3: Attach the Bottom

Place the 1x8 bottom board inside the box and secure it to the sides using wood glue and 2" screws. Be sure to drill pilot holes to prevent the wood from splitting.

Step 4: Create the Roof

Attach the two 1x4 roof boards to the top of the box using wood glue and 2" screws. These boards should overhang the sides slightly to create a protective overhang.

Step 5: Install the Entry Hole

In one of the sides, cut a 4" diameter hole for the squirrel entry. Use a jigsaw or drill a series of overlapping holes to create the opening. Attach a piece of heavy-duty wire mesh to the inside of the hole with screws or staples. This will provide support for the hole and prevent the squirrels from getting stuck or injured.

Step 6: Add Metal Flashing

Cut a piece of metal flashing slightly larger than the roof area. Use screws or roofing nails to secure the flashing to the underside of the roof, creating a watertight seal.

Step 7: Paint or Stain (Optional)

If you want to enhance the look and protect the wood, apply an exterior paint or stain. Allow the paint or stain to dry completely before mounting the box.

Step 8: Mount the Squirrel Box

Choose your chosen location and carefully mount the squirrel box using heavy-duty screws and a drill. Ensure the box is secure and level.

Tips for Maintaining Your Squirrel Box

To ensure your squirrel box remains a safe and comfortable home for your furry residents, make sure to clean it periodically. Here's how:

  • Clean the box at least once a year or as needed.
  • Remove any old nesting materials and debris.
  • Inspect the box for signs of damage and repair as necessary.
  • Avoid using harsh chemicals or pesticides that could harm the squirrels.

Enjoy Your New Squirrel Box!

Congratulations! You've built a durable and attractive squirrel box for your neighborhood squirrels. Now, watch as they move in and enjoy their new home. Remember, provide a steady source of food and water, and you'll be sure to have happy and healthy squirrels in your backyard for years to come!

Craft a hidden compartment magic box with wood

Craft a hidden compartment magic box with wood

Crafting a Hidden Compartment Magic Box

Dive into the world of woodworking and craft a captivating magic box that conceals a secret compartment. This project combines the artistry of woodworking with the element of surprise, making it a perfect gift or a unique addition to your home decor. Let's embark on this exciting journey together!

Gather Your Materials

Before you start, make sure you have all the necessary tools and materials. This list will guide you:

  • Wooden box (choose a size that suits your needs)
  • Wood glue
  • Wood screws
  • Small hinges
  • A small piece of wood for the hidden compartment door
  • Sandpaper (different grits)
  • Wood stain or paint (optional)
  • Clear sealant (optional)
  • Measuring tape
  • Saw (hand saw or jigsaw)
  • Drill
  • Screwdriver
  • Clamps
  • Pencil

Planning the Secret Compartment

Start by planning the size and location of your hidden compartment. Consider what you want to store inside and choose a space that is both functional and visually appealing.

Measure the inside of the box carefully and mark the area where you will cut out the compartment. Remember to leave enough space around the compartment door for hinges and a secure fit.

Cutting the Compartment Door

Using your saw, carefully cut out the rectangular shape of the compartment door from your small piece of wood. You'll want to ensure it's a snug fit within the opening you created in the box.

Assembling the Secret Compartment

Now, it's time to bring your secret compartment to life.

  1. Attach the hinges: Position your hinges on the compartment door and carefully screw them in place. Make sure they are securely attached, and ensure the door opens and closes smoothly.
  2. Install the compartment: Carefully glue the compartment door to the inside of the box. Secure it with screws, ensuring it's flush with the box's walls.
  3. Test the door: Once the glue dries, test the compartment door. It should open and close smoothly, revealing your secret space.

Finishing Touches

Give your magic box a polished look by sanding it with different grits of sandpaper, starting with a coarser grit and finishing with a finer one.

Now, you can add a touch of personality to your magic box. Apply a wood stain or paint, ensuring the compartment door is carefully masked to avoid staining or painting the secret opening.

Finally, consider applying a clear sealant to protect your box from scratches and spills.

Your Secret Compartment Magic Box is Ready!

Congratulations! You have successfully created a magical hidden compartment box. Enjoy the satisfaction of completing this DIY project, and relish the joy of having a secret space within your reach. This box will surely add a touch of mystery and intrigue to any space.

Squirrel Box Plans with PDF Downloads for Woodworkers

Squirrel Box Plans with PDF Downloads for Woodworkers

Squirrel Box Plans with PDF Downloads for Woodworkers

If you're a woodworker looking for a fun and rewarding project, building a squirrel box is a great option. Not only will you provide a safe and comfortable shelter for these adorable creatures, but you'll also get to enjoy the satisfaction of creating something beautiful and functional with your own two hands. With a variety of styles and designs available, you can find a squirrel box plan that perfectly matches your skill level and aesthetic preferences.

Choosing the Right Squirrel Box Plan

Before you start building, it's important to choose the right plan. There are countless options available online, but here are some key features to consider:

Size and Dimensions

The size of the squirrel box should be appropriate for the species you plan to attract. Smaller squirrels like Eastern gray squirrels will be comfortable in a box with an interior space of 10" x 10" x 12", while larger squirrels like fox squirrels may require a box that's 12" x 12" x 16".

Entry Hole Size

The entry hole should be just large enough for the squirrels to enter and exit easily, but small enough to prevent larger predators from accessing the box. A 3" diameter hole is typically recommended for most squirrel species.

Materials

Most squirrel boxes are constructed from wood, but you can also find plans that incorporate other materials like metal or plastic. Choose materials that are durable and weather-resistant to ensure your squirrel box lasts for years to come.

Style and Design

Squirrel boxes come in various styles and designs, from simple and functional to more intricate and decorative. Choose a plan that reflects your personal taste and complements your backyard. Remember to check local regulations regarding building materials and design.

Finding Squirrel Box Plans with PDF Downloads

Once you know what features you're looking for in a squirrel box, it's time to start your search for plans. Here are some great resources to get you started:

Online Retailers

Numerous online retailers offer downloadable squirrel box plans in PDF format. These plans often come with detailed instructions, diagrams, and cut lists, making building your box a breeze. Popular retailers include:

  • Etsy
  • Amazon
  • Woodcraft

Woodworking Websites and Forums

Many woodworking websites and forums feature free or paid squirrel box plans. These communities are excellent sources for inspiration, tips, and advice from experienced woodworkers. Some popular websites include:

  • Woodworking for Mere Mortals
  • LumberJocks
  • The Woodworking Community

Local Libraries and Community Centers

Your local library or community center may have books or resources with squirrel box plans. Don't hesitate to ask their staff for help. You can also check online catalogs for available resources.

Tips for Building a Squirrel Box

Once you've chosen your plans, it's time to start building. Here are some tips to help you create a durable and attractive squirrel box:

  • Use high-quality wood that's resistant to rot and insect damage.
  • Apply a weatherproof finish to protect the wood from the elements.
  • Drill the entry hole at a slight upward angle to prevent water from entering the box.
  • Install the box in a shaded location, away from direct sunlight.
  • Place the box at least 6 feet off the ground to protect it from predators.

Conclusion

Building a squirrel box is a wonderful way to connect with nature and provide a safe haven for these adorable creatures. With the right plan and a little bit of effort, you can create a squirrel box that will last for years to come. So grab your tools, download your plans, and get ready to build a cozy home for your local squirrels!

Tips for Building a Cold Frame on a Budget

Tips for Building a Cold Frame on a Budget

Build a Cold Frame on a Budget

A cold frame is a fantastic tool for any gardener, especially if you're on a budget. This simple structure allows you to extend your growing season, start seeds earlier, and protect tender plants from the elements. The best part? You can build a sturdy cold frame without breaking the bank. Let's explore some budget-friendly tips to get you started.

Choose Your Materials Wisely

The key to building a cold frame on a budget is to embrace resourceful materials. Look around your home and yard for potential building blocks. Here are some ideas:

Reclaimed Wood

Don't underestimate the power of reclaimed wood. Old pallets, fence boards, or even scrap lumber from a recent project can be transformed into a cold frame. Sand and stain them for a polished look.

Clear Plastic

Clear plastic sheeting is the most common cover for cold frames. You can find affordable options at hardware stores or online retailers. Consider using two layers for extra insulation, especially in colder climates.

Glass

If you're looking for a more traditional look, consider using old windows or a glass door. While glass can be more expensive, it will last longer and provide better light transmission than plastic.

Get Creative with Design

A cold frame doesn't have to be complicated. Get creative and adapt your design to your needs and available materials. Here are some simple and effective cold frame ideas:

Simple Box Frame

Construct a rectangular frame using wood or salvaged materials. Attach hinges to one side, and use a simple latch to secure the lid. This design is perfect for beginners and requires minimal tools.

Lean-To Frame

This option utilizes an existing wall or fence for support. Construct a frame with an angled roof to maximize sunlight and drainage. This design is great for small spaces.

Upcycled Cold Frame

Turn old furniture or household items into a cold frame. A vintage dresser drawer, a discarded bathtub, or even an old refrigerator door can be repurposed with minimal effort.

Embrace DIY Strategies

Save even more money by taking on the DIY aspect yourself. These tips will help you maximize your budget:

  • Build the frame yourself.
  • Avoid purchasing pre-made components.
  • Research free or low-cost materials.
  • Ask friends or family for scrap wood or other materials they might have.
  • Check out local recycling centers or Habitat for Humanity ReStore.
  • Get creative with your design and materials.
  • Enjoy Your Budget-Friendly Cold Frame

    With a little creativity and resourcefulness, you can build a cold frame that fits your needs and budget. Embrace the DIY process, and enjoy the rewards of a longer growing season and bountiful harvests!

    Diy grill gazebo construction: easy plans for everyone

    Diy grill gazebo construction: easy plans for everyone

    DIY Grill Gazebo Construction: Easy Plans for Everyone

    Imagine this: a warm summer evening, the tantalizing aroma of grilling food fills the air, and you're relaxing in the comfort of your very own grill gazebo. No more battling the elements or squinting at the sun. With a DIY grill gazebo, you can create a dedicated space for grilling and entertaining that's both functional and stylish. This comprehensive guide provides easy-to-follow plans, regardless of your construction experience, empowering you to build your dream gazebo.

    Planning Your Grill Gazebo

    Before you start hammering and sawing, it's essential to plan your gazebo project meticulously. This includes determining the size, style, and materials.

    Size and Style

    The size of your gazebo should comfortably accommodate your grill, seating, and any additional features like storage. Consider the dimensions of your grill and the number of guests you typically entertain. You can choose from various styles, such as a classic rectangular design, an octagonal gazebo for a more unique look, or even a curved design for a modern touch.

    Materials

    When selecting materials, consider your budget, aesthetic preferences, and durability. Common materials include:

    • Wood: Durable, versatile, and readily available. Choose treated lumber for longevity.
    • Metal: Provides strength and low maintenance. Aluminum is lightweight and rust-resistant.
    • PVC: Lightweight, weather-resistant, and budget-friendly.

    Additionally, consider the roofing material. Options include vinyl, metal, or canvas, each offering different benefits in terms of cost, durability, and appearance.

    Step-by-Step Construction Guide

    Let's get down to business! Here's a detailed guide for building your grill gazebo:

    Step 1: Foundation

    Start by preparing a solid foundation for your gazebo. You have a few options:

    • Concrete: Provides the most robust and durable foundation.
    • Paver stones: A visually appealing and relatively easy option.
    • Pressure-treated lumber: Budget-friendly and suitable for lighter gazebos.

    Ensure the foundation is level and large enough to support the gazebo's weight.

    Step 2: Framing

    Now, let's assemble the framing, which provides the structure for your gazebo.

    • Cut lumber: Use a saw to cut the lumber to the desired lengths according to your plans.
    • Connect pieces: Securely join the frame pieces using screws, bolts, or specialized connectors.
    • Construct the roof: Create the roof frame by cutting and joining rafters, and secure them to the top of the gazebo.

    Be sure to check for squareness and levelness throughout the process for a sturdy gazebo.

    Step 3: Roofing

    Next, you'll install the roofing material.

    • Install sheathing: Place sheathing boards over the roof frame to create a solid base for the roofing.
    • Apply roofing: Attach your chosen roofing material following the manufacturer's instructions.

    For vinyl or metal roofing, consider using roofing nails and flashing. For canvas roofing, secure it with tensioning systems.

    Step 4: Siding and Trim

    To enhance the gazebo's appearance and provide additional protection, add siding and trim.

    • Install siding: Attach siding boards to the gazebo's exterior, following your design plan.
    • Add trim: Install trim pieces around windows, doors, and the roofline for a finished look.

    Choose siding and trim materials that complement your gazebo's overall style.

    Step 5: Finishing Touches

    Finally, personalize your gazebo with decorative elements.

    • Paint or stain: Enhance the gazebo's appearance by painting or staining the wood or metal surfaces.
    • Install lighting: Add lighting for ambiance and safety. Consider LED lights for energy efficiency.
    • Add accessories: Enhance the gazebo with accessories like curtains, screens, or a ceiling fan for greater comfort.

    Your DIY grill gazebo is now ready to transform your outdoor space into a welcoming haven for grilling and entertaining.

    DIY Birdhouse with a Low Roof: How to Build It

    DIY Birdhouse with a Low Roof: How to Build It

    DIY Birdhouse with a Low Roof: How to Build It

    A charming birdhouse can add a touch of whimsy to your garden and provide a safe haven for our feathered friends. Among the many styles, a birdhouse with a low roof boasts a unique aesthetic, inviting a delightful sense of coziness and charm. This guide will lead you through the construction process, enabling you to craft your own low-roofed birdhouse with ease.

    Materials You'll Need

    To embark on this woodworking project, gather the following materials:

    • Wood: Select 1/2-inch thick pine, cedar, or redwood for durability and weather resistance.
    • Wood glue:
    • Wood screws: 1 1/4-inch and 1 1/2-inch lengths for secure assembly.
    • Saw: A hand saw, circular saw, or jigsaw for cutting the wood to size.
    • Drill: A drill with a variety of drill bits.
    • Measuring tape:
    • Pencil:
    • Sandpaper: Various grits for smoothing the surfaces.
    • Paint or stain: To enhance the appearance and provide protection (optional).
    • Roofing shingles or weatherproof sealant:
    • Entrance hole saw or drill bit:
    • Optional: Wood filler for imperfections, and varnish or polyurethane for a protective finish.

    Detailed Construction Steps

    Step 1: Design and Prepare

    Before diving into construction, determine the desired dimensions of your birdhouse. Consider the bird species you wish to attract, as their size will dictate the entrance hole size and overall dimensions. A good starting point for a small birdhouse is approximately 6 inches wide by 8 inches tall and 6 inches deep.

    After deciding on the size, create a simple sketch or diagram to visualize the birdhouse's shape. The low roof will be slightly angled, with the front edge being lower than the rear edge.

    Step 2: Cut the Wood

    Following your design, measure and cut the wood pieces using a saw. You'll need the following parts:

    • Two front and back panels: Each panel will be the height of the birdhouse (8 inches) and the depth (6 inches).
    • Two side panels: The side panels will be the width of the birdhouse (6 inches) and the height of the birdhouse (8 inches).
    • One bottom panel: This will be the width of the birdhouse (6 inches) and the depth (6 inches).
    • Two roof pieces: The roof pieces will be slightly longer than the width of the birdhouse (7 inches) and the desired depth of the roof overhang (2 inches).

    Ensure that all cuts are precise for a smooth and stable assembly.

    Step 3: Assemble the Birdhouse Body

    Now, assemble the birdhouse body, excluding the roof.

    1. Apply wood glue to the edges of the front and back panels where they will meet the side panels. Secure them together with wood screws, ensuring that the screws are countersunk (flush with the wood).
    2. Attach the bottom panel to the assembled front, back, and side panels, using wood glue and screws.
    3. Once the body is complete, take the entrance hole saw or drill bit and carefully create the entrance hole on one of the front panels. The entrance hole size should be appropriate for the bird species you intend to attract. For smaller birds like chickadees, a 1 1/2-inch diameter hole is suitable. For larger birds, a 2-inch hole is recommended.
    4. Position the hole at the desired height, usually about 4-6 inches from the bottom of the house.

    Step 4: Create the Low Roof

    The unique low roof of this birdhouse is formed by attaching two roof pieces at a slight angle.

    1. Cut two roof pieces to the desired length (7 inches) and width (2 inches).
    2. Use a saw to cut a bevel on the front edge of each roof piece. The angle of the bevel will determine the pitch of the roof. A gentle angle, such as 10-15 degrees, is suitable for a low roof.
    3. Apply wood glue to the beveled edges of the roof pieces. Attach them to the top of the birdhouse, ensuring that the beveled edges are facing inwards. Use screws to secure the roof pieces to the birdhouse body.
    4. For added stability, you can attach a small piece of wood, called a ridge board, along the center seam of the roof. This will help to prevent the roof from sagging over time.

    Step 5: Final Touches

    1. Sand all surfaces of the birdhouse, including the roof, using sandpaper of progressively finer grits. This will create a smooth finish and remove any rough edges.
    2. To enhance the appearance and provide protection, paint or stain the birdhouse. Choose colors that blend well with your garden environment.
    3. Apply roofing shingles or weatherproof sealant to the roof to create a watertight seal.
    4. To enhance the birdhouse's appeal, consider adding decorative details such as a small perch below the entrance hole.
    5. Optionally, you can fill any imperfections or nail holes with wood filler and sand it smooth after it dries.
    6. To add a protective coating, apply varnish or polyurethane to the birdhouse. This will help to protect the wood from the elements and keep the paint or stain looking fresh for years to come.

    Placing and Maintaining Your Birdhouse

    Once your birdhouse is complete, carefully select a location in your garden. Here are some key considerations:

    • Sun and Shade: Choose a spot that receives partial sun and shade. Birds prefer locations that offer shelter from harsh sunlight and rain.
    • Height: Mount the birdhouse at a height of 5-6 feet above the ground. This will deter predators and provide a safe haven for nesting birds.
    • Orientation: Position the entrance hole facing away from the prevailing wind and rain. This will help to protect the birds from the elements.
    • Predator Protection: To prevent predators from accessing the birdhouse, place it at a distance from trees or shrubs that could provide hiding places.

    To ensure the longevity of your birdhouse, consider these maintenance tips:

    • Clean Regularly: Clean the birdhouse twice a year, in the spring and fall, to remove any accumulated debris or parasites.
    • Inspect for Damage: Inspect the birdhouse for signs of damage such as cracks, holes, or loose screws. Repair any damage promptly to ensure the safety of the birds.

    By building a charming birdhouse with a low roof, you'll create an inviting haven for birds in your garden. The joy of watching birds nest and raise their young will be a rewarding testament to your woodworking efforts.

    Building a woodworking desk on a budget: tips and tricks

    Building a woodworking desk on a budget: tips and tricks

    Building a Woodworking Desk on a Budget: Tips and Tricks

    Hey there, fellow woodworkers! You're probably here because you're itching to build a new desk for your workshop, but maybe your budget isn't as enthusiastic as you are. Don't worry, you can totally build a fantastic desk without breaking the bank! It’s all about getting creative and utilizing some smart strategies. I’m going to spill all the secrets I’ve learned over the years to make your woodworking desk dreams a reality, without sacrificing quality or style.

    Start with the Basics: Materials and Tools

    Before we dive into the fun stuff, let's tackle the essentials. The right materials and tools can make or break your project, especially when you're working on a budget.

    Materials: Think Outside the Box

    You don't always need to spend a fortune on fancy woods. Here’s a little secret: Many great, budget-friendly options are out there. You can often find good deals on salvaged or reclaimed lumber, or even shop around for affordable hardwoods like pine, poplar, or birch. Check out local lumberyards, salvage yards, and even Craigslist for hidden gems. Don't be afraid to get creative with your choices, as there’s no rule that says your desk has to be made of mahogany to be beautiful.

    Tools: Essential Gear, Smart Alternatives

    You don’t need a full woodworking shop to build a desk. Start with the basics: a saw (circular saw, jigsaw, or a handsaw), a drill, a sander, and some clamps. You can even rent tools if needed. For some cuts, a table saw can be helpful, but if you’re on a tight budget, a good track saw can be an amazing alternative.

    Plan Your Design: Keeping it Simple, Yet Stylish

    Now it's time to sketch out your desk’s blueprint! Think about your needs and the space you have. Do you need a large work surface, a lot of storage, or a specific setup for your tools?

    Simple Designs are Your Friend

    Keep it clean and straightforward to avoid unnecessary complications. A basic rectangular desk with drawers or shelves is a classic choice. Don’t be afraid to look for inspiration online! Search for “simple woodworking desk plans” and you’ll find a treasure trove of free, downloadable blueprints.

    Maximize Your Materials

    Get creative with your cuts and minimize waste. Use scrap wood for small parts or even for decorative accents. You can also find clever ways to join boards together to make the most of your materials.

    Construction: Putting It All Together

    Once you have your materials and plan, it's time to build! Here are some tips to make the process easier and more affordable.

    Get a Helping Hand (Or Two)

    Enlist some friends or family members to assist with the heavier tasks. Building a desk is much easier with an extra set of hands!

    Use Pocket Holes (They’re Your New Best Friend)

    Pocket holes are a game-changer for woodworking. They make it easy to join boards together with screws for strong, hidden connections. Get yourself a pocket hole jig â€" you can usually find them for under $50 â€" and it’ll quickly become one of your favorite tools.

    Don’t Be Afraid to Use Wood Glue

    Wood glue is your secret weapon for strong, durable joints. It’s a great way to reinforce your construction and keep your desk looking its best.

    Finishing Touches: Making Your Desk Shine

    Once your desk is assembled, it’s time to add the finishing touches.

    Sanding is Key

    Take your time sanding. Smooth out any rough edges or imperfections, and you’ll be amazed at the difference a little sanding can make.

    Finishing Options on a Budget

    You don’t need to spend a fortune on expensive finishes. A simple oil-based polyurethane or a wax finish will do wonders. You can also try a natural oil-based finish, like tung oil or linseed oil, for a more rustic look.

    Accessorize and Personalize

    Give your desk a personal touch with some accessories! Add a little character with hardware, lighting, and decorative elements. You can even use your woodworking skills to create unique desk accessories, like pencil holders or drawer pulls.

    Don’t Forget the Fun Part!

    Remember, woodworking should be enjoyable! Don’t get bogged down in the details. Take breaks, listen to some music, and enjoy the process. You’ll have a desk that you can be proud of, and that’s a feeling you can’t buy.

    Bonus Tips and Tricks

    Here are some additional tips to make your woodworking desk adventure even smoother:

    • Measure Twice, Cut Once: It’s a woodworking classic for a reason! Accurately measuring and cutting your materials will prevent headaches and rework.
    • Plan for Storage: Think about how you’ll store your tools and supplies. A few drawers, shelves, or even a simple pegboard will keep your workspace organized and efficient.
    • Don’t Be Afraid to Experiment: Woodworking is all about learning and trying new things. If you’re unsure about a technique, try it out on a scrap piece of wood first.
    • Embrace the Imperfections: No woodworking project is perfect! Learn to appreciate the little flaws, as they add character and charm to your creation.

    Building a woodworking desk on a budget can be a rewarding experience. With a little planning, creativity, and these tips, you can create a fantastic piece of furniture that will last for years to come. Happy building!

    How to create an in-wall gun cabinet with adjustable shelves for firearms

    How to create an in-wall gun cabinet with adjustable shelves for firearms

    Building Your Own In-Wall Gun Cabinet with Adjustable Shelves

    Safeguarding your firearms is paramount, and an in-wall gun cabinet offers a discreet and secure solution. Building your own in-wall gun cabinet allows you to tailor it to your specific needs and preferences. This comprehensive guide will walk you through the process step-by-step, ensuring you create a secure and stylish storage solution for your firearms.

    Planning and Preparation

    Before diving into construction, meticulous planning is essential. Carefully consider these factors:

    Location and Dimensions

    Choose a wall location that provides adequate space and meets your storage requirements. Determine the desired cabinet dimensions, considering the size of your firearms and the number of shelves needed.

    Materials and Tools

    Gather the necessary materials, including plywood, lumber, hinges, a locking mechanism, paint or stain, and screws. You will need basic woodworking tools like a saw, drill, sander, and measuring tape.

    Safety Precautions

    Always prioritize safety! Wear appropriate protective gear like safety glasses and gloves. Ensure you have a clear and organized workspace to prevent accidents.

    Constructing the Cabinet Frame

    The foundation of your gun cabinet lies in its sturdy frame:

    Cutting the Frame Pieces

    Using your chosen materials, cut the pieces for the cabinet frame based on your planned dimensions. Ensure all cuts are precise for a neat and secure fit.

    Assembling the Frame

    Join the frame pieces using wood glue and screws for a strong bond. Use clamps to hold the pieces together while the glue dries. Double-check all corners are square and aligned for a professional finish.

    Creating Adjustable Shelves

    Adjustable shelves provide versatility for different firearms and storage needs:

    Choosing Shelf Material

    Plywood is a common choice for shelves, offering strength and durability. Consider the weight of your firearms when selecting the thickness of the plywood.

    Adding Shelf Supports

    Install shelf supports along the sides of the cabinet. These can be metal brackets or wood strips that provide a secure platform for the shelves.

    Adding Shelf Adjustment Mechanisms

    For adjustability, use shelf pins and slots. Drill holes into the cabinet sides to create slots for the pins. This allows you to move the shelves up or down as needed.

    Integrating Security Measures

    A gun cabinet's primary function is security:

    Installing a Locking Mechanism

    Select a sturdy and reliable locking mechanism, such as a key lock or a combination lock. Install the lock securely on the cabinet door.

    Adding Additional Security Features

    For extra protection, you can consider adding security features like motion sensors or tamper-proof hinges.

    Finishing Touches

    Add the final touches to complete your gun cabinet:

    Sanding and Finishing

    Sand the cabinet surface smooth using progressively finer sandpaper. Apply a paint or stain of your choice to achieve the desired aesthetic.

    Installing the Door

    Attach the cabinet door using hinges and ensuring a smooth and secure operation. If desired, you can add decorative trim or molding.

    Installation and Safety

    Once the cabinet is complete, it's time to install it securely:

    Mounting the Cabinet

    Mount the cabinet securely to the wall using heavy-duty anchors and screws that are appropriate for the wall material.

    Safety Recommendations

    Keep firearms out of reach of children and unauthorized individuals. Always store firearms in a locked cabinet and use appropriate trigger locks.

    Building your own in-wall gun cabinet allows you to create a customized and secure storage solution. Remember to prioritize safety throughout the process, carefully plan your design, and choose high-quality materials. With meticulous construction and attention to detail, you will have a secure and discreet home for your firearms.