Sunday, 2 February 2025

Chaise Lounge Woodworking Plans for Relaxing Outdoors

Craft Your Perfect Outdoor Oasis: Detailed Chaise Lounge Woodworking Plans

Escape the everyday and create your own personal paradise with a handcrafted chaise lounge. This detailed guide provides comprehensive woodworking plans to build a stunning, relaxing outdoor retreat. Imagine sinking into the comfort of your own creation, the warm sun on your skin, a good book in hand – this isn't just a project; it's an investment in blissful relaxation.

Choosing Your Wood and Materials

The heart of your chaise lounge lies in the quality of its wood. Teak, known for its weather resistance and rich color, provides an elegant, durable option. Cedar offers a beautiful aromatic experience alongside its natural rot resistance. Alternatively, pressure-treated pine provides a more budget-friendly choice, though it requires regular maintenance. Beyond the wood, consider these essential materials:

Essential Materials List:

  • Wood (Teak, Cedar, or Pressure-Treated Pine) – refer to the detailed cut list in the plans.
  • Exterior-grade wood screws (various lengths).
  • Wood glue (exterior-grade).
  • Sandpaper (various grits).
  • Wood stain or sealant (exterior-grade, choose a color to complement your outdoor space).
  • Measuring tape.
  • Level.
  • Safety glasses.
  • Clamps.
  • Drill with appropriate drill bits.

Constructing the Chaise Lounge Frame

Begin by carefully reviewing the detailed plans, ensuring you understand each cut and joinery technique. Precise measurements are paramount for a stable and aesthetically pleasing chaise lounge. Start with the main frame, carefully cutting the wood to the specified lengths and angles. Use wood glue and screws to create strong, durable joints. Always pre-drill pilot holes to prevent wood splitting. Clamp the pieces firmly in place while the glue dries, ensuring everything is square and level. Take your time – patience is key to a successful build.

Adding Comfort and Style

Once the frame is complete, it's time to enhance the comfort and style of your chaise lounge. You'll need to construct the slats for the seating surface, ensuring they're evenly spaced and securely attached. Consider adding curved slats for a more ergonomic design. Finally, apply your chosen wood stain or sealant to protect the wood from the elements and enhance its natural beauty. Allow ample drying time before using the chaise lounge. Remember to apply multiple coats for optimal protection.

Finishing Touches and Customization

Personalize your chaise lounge with additional touches that reflect your style. Consider adding armrests for enhanced comfort or integrating a small table for drinks. You might also explore adding a canopy for shade on sunny days. A final sanding will ensure a smooth, comfortable surface. Remember, this is your creation – feel free to experiment and add your own unique flair.

Enjoy Your Handcrafted Oasis

Congratulations! You've successfully built your own handcrafted chaise lounge. Now, relax, unwind, and savor the fruits of your labor. Enjoy the quiet satisfaction of creating something beautiful and functional, a testament to your skills and dedication. Your outdoor oasis awaits!

Holiday Woodworking Plans for Year-Round Projects

Holiday Woodworking Plans for Year-Round Projects

The satisfying scent of freshly cut wood, the whir of the saw, the gentle caress of sandpaper – woodworking offers a unique blend of creativity and craftsmanship. While many associate woodworking with holiday-themed projects, the skills and techniques you learn can be applied throughout the year, creating beautiful and functional pieces for every season. This article explores exciting woodworking plans, perfect for holiday crafting but adaptable for year-round enjoyment. Forget fleeting festive decorations; let's build lasting heirlooms!

Crafting Festive Fun: Holiday-Inspired Projects

The holiday season naturally lends itself to woodworking. Imagine the warm glow of a handcrafted star illuminating your Christmas tree, or the rustic charm of a personalized wooden ornament hanging proudly. These aren't just decorations; they're tangible expressions of love and creativity. Consider starting with simpler projects to build confidence. A straightforward project like a snowflake ornament utilizes basic cuts and sanding, perfect for beginners. More advanced woodworkers can tackle intricate designs, like a detailed nativity scene or a charming reindeer sleigh. Don't forget the practical aspects! A beautifully crafted wooden advent calendar adds a touch of elegance and anticipation to the countdown to Christmas.

Beginner-Friendly Ornaments

Beginners can easily create beautiful ornaments using simple shapes and techniques. Start with a basic geometric shape like a star or a tree. Use pre-cut pieces of wood from a craft store to simplify the process. You can then decorate them using paint, stain, decoupage, or even pyrography for a personalized touch. Remember to pre-drill holes for hanging – this prevents splitting the wood and ensures a clean finish.

Intermediate to Advanced Holiday Decor

For intermediate woodworkers, a more ambitious undertaking like a wooden toy train or a detailed Santa Claus figure presents a rewarding challenge. These projects require more precise cutting and potentially joinery techniques like dovetail or mortise and tenon joints, allowing you to hone your skills. Advanced woodworkers can create incredibly detailed and intricate pieces like miniature houses or even a full-size wooden Christmas tree stand, showcasing their expertise. The possibilities are truly endless!

Beyond the Holidays: Adapting Your Skills

The skills honed during holiday crafting are invaluable throughout the year. The precise cuts needed for a snowflake ornament translate perfectly to creating intricate fretwork for a summer garden trellis. The joinery techniques used in building a wooden toy train can be applied to constructing durable shelves or a sturdy plant stand. The techniques of sanding and finishing, essential for creating a smooth, polished ornament, are equally crucial for building beautiful pieces of furniture.

Year-Round Projects Using Holiday Skills

  • Garden Trellises: Use fretwork techniques developed while creating holiday ornaments to design beautiful and functional trellises for your climbing plants.
  • Custom Shelves: The joinery and finishing techniques used in holiday projects are perfect for crafting bespoke shelves to perfectly fit your needs.
  • Birdhouses: Simple birdhouses provide a fantastic opportunity to practice cutting, shaping, and assembling wooden components.
  • Personalized Toys: The skills you learned creating holiday toys can be applied to crafting unique, personalized toys for birthdays or other special occasions.
  • Choosing the Right Wood and Tools

    Selecting appropriate wood is critical for successful woodworking. For ornaments, lighter woods like basswood or balsa are easier to carve and manipulate. For more robust projects, hardwoods like oak or maple offer durability and a beautiful finish. Ensure you have the necessary tools for your chosen project; from basic hand tools like saws, chisels, and sandpaper to power tools like drills, routers, and sanders. Safety should always be your top priority. Always wear appropriate safety equipment, including eye protection and dust masks.

    Woodworking is a journey of continuous learning and refinement. By starting with holiday projects and then branching out into year-round creations, you'll develop valuable skills, create stunning pieces, and find a deeply rewarding hobby that offers joy and satisfaction all year long.

    DIY Woodwork Projects for Every Skill Level and Style

    DIY Woodwork Projects for Every Skill Level and Style

    The allure of woodworking lies in its ability to transform raw materials into functional and aesthetically pleasing objects. From intricate furniture pieces to simple, rustic décor, the possibilities are virtually limitless. This comprehensive guide explores a range of DIY woodworking projects, categorized by skill level and style, to inspire and empower woodworkers of all abilities.

    Beginner-Friendly Projects: Mastering the Fundamentals

    For those new to woodworking, starting with straightforward projects is crucial for building confidence and developing essential skills. These projects focus on basic techniques like sawing, sanding, and simple joining methods, providing a solid foundation for more complex endeavors.

    Simple Shelves: A Foundation for Organization

    Constructing simple floating shelves is an excellent introductory project. This involves cutting lumber to size, sanding the edges smooth, and securing the shelves to the wall using appropriate brackets. Choosing a readily available wood like pine or fir minimizes cost and complexity. The project allows beginners to practice accurate measuring and cutting, crucial skills in woodworking.

    Materials: Pine or fir boards, shelf brackets, wood screws, wood glue, sandpaper, wood finish (optional).

    A Rustic Coasters Set: Embracing Imperfection

    Crafting a set of rustic coasters offers a charming and functional project for beginners. Utilizing readily available wood scraps, this project primarily involves cutting the wood into square or circular shapes, sanding them down, and applying a protective finish. The rustic aesthetic embraces imperfections, minimizing pressure for perfect cuts and allowing for experimentation.

    Materials: Wood scraps (various types and sizes), sandpaper, wood finish (e.g., polyurethane, varnish), felt pads (optional).

    A Basic Birdhouse: A Touch of Nature

    Building a simple birdhouse is not only a rewarding project but also contributes to wildlife conservation. This involves cutting and assembling pre-cut pieces, emphasizing accuracy in measurements and careful joining techniques. The use of pre-cut kits simplifies the construction process, making it ideal for beginners to understand basic assembly and appreciate the satisfaction of creating something useful.

    Materials: Pre-cut birdhouse kit or individual lumber pieces, wood glue, nails or screws, paint or stain (optional).

    Intermediate Projects: Refining Techniques and Expanding Creativity

    Once basic woodworking techniques are mastered, intermediate projects offer the opportunity to refine skills and explore more complex joinery methods. These projects often involve more intricate designs and the use of a wider range of tools.

    A Classic Wooden Tray: Mastering Joint Techniques

    Building a wooden tray allows for the practice of more sophisticated joinery techniques such as miter joints or rabbet joints. This project demands precision in cutting angles and ensuring tight fits. The choice of wood can influence both the aesthetics and the difficulty of the project. Hardwood like cherry or maple offers a more refined look but requires more skill to work with.

    Materials: Hardwood lumber (cherry, maple, or similar), wood glue, clamps, wood screws, sandpaper, wood finish.

    A Wall-Mounted Key Holder: Incorporating Functional Design

    Crafting a wall-mounted key holder combines functionality with design. This project encourages creativity in shaping the wood and integrating hooks or other functional elements. Exploring different finishes and hardware enhances the personalization of the piece. The design can range from simple and minimalist to more ornate and detailed.

    Materials: Wood of choice, hooks (metal or wood), wood glue, screws, sandpaper, wood finish, wall mounting hardware.

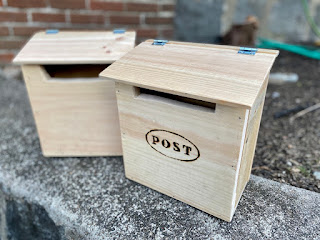
    A Small Wooden Box: Exploring Intricate Details

    Creating a small wooden box, particularly one with a hinged lid, provides an opportunity to practice fine woodworking skills, including precise measurements, accurate joinery, and the use of hinges. This project involves more detailed work and demands patience and precision. The box can be customized with intricate carvings, inlay work, or unique hardware.

    Materials: Hardwood lumber, hinges, wood glue, clamps, sandpaper, wood finish, decorative elements (optional).

    Advanced Projects: Challenging Skills and Artistic Expression

    Advanced woodworking projects demand a high level of skill, precision, and a thorough understanding of woodworking techniques. These projects often involve intricate designs, complex joinery, and the use of specialized tools.

    A Custom-Built Coffee Table: Mastering Complex Joinery

    Constructing a custom coffee table requires advanced skills in joinery, finishing, and potentially even inlay work. This project is ideal for demonstrating mastery of different woodworking techniques and a keen eye for design. The choice of wood and finish significantly impacts the aesthetic and overall quality.

    Materials: Hardwood lumber (depending on design), wood glue, clamps, specialized joinery tools, wood screws, sandpaper, wood finish, hardware (depending on design).

    A Detailed Wooden Clock: Precision and Patience

    Building a wooden clock is an advanced project that demands both fine woodworking skills and a grasp of clock mechanisms. This project requires meticulous attention to detail and precision in cutting and assembling components. The clock face design and choice of movement add an additional layer of complexity and personalization.

    Materials: Hardwood lumber, clock movement kit, wood glue, sandpaper, wood finish, clock hands, decorative elements (optional).

    A Hand-Carved Wooden Sculpture: Artistic Expression

    Creating a hand-carved wooden sculpture is the epitome of advanced woodworking, requiring substantial artistic skill and a deep understanding of wood grain and carving techniques. This project allows for complete creative expression and is a testament to the woodworker's mastery of the craft. The choice of wood directly affects the carving process and the final aesthetic.

    Materials: Hardwood lumber suitable for carving (e.g., basswood, butternut), carving tools (various chisels, gouges), sandpaper, wood finish (optional).

    Regardless of skill level, embarking on a DIY woodworking project provides a rewarding experience. The satisfaction of creating something tangible with one's own hands is unparalleled. By starting with simpler projects and gradually progressing to more challenging ones, woodworkers can continually hone their skills and express their creativity through the beauty and artistry of wood.

    Saturday, 1 February 2025

    Download Comprehensive Woodworking Plans for Easy Access and Builds

    Unlock Your Inner Craftsman: Downloadable Woodworking Plans for Effortless Projects

    Tired of browsing countless websites, sifting through blurry images and confusing instructions? Imagine having a comprehensive library of detailed woodworking plans at your fingertips, ready to transform your woodworking dreams into tangible reality. This article unveils the secret to effortless woodworking projects, guiding you to readily available, expertly designed plans that simplify the entire process, from initial concept to polished finish. Prepare to elevate your woodworking skills and create stunning pieces you'll cherish for years to come.

    The Power of Downloadable Woodworking Plans

    Downloadable woodworking plans offer an unparalleled level of convenience and accessibility. Forget rummaging through dusty books or struggling to decipher handwritten notes. These digital plans provide clear, concise instructions, often accompanied by high-resolution diagrams, detailed measurements, and even material lists. This ensures a smooth, organized workflow, minimizing frustration and maximizing your enjoyment of the crafting process. Imagine confidently tackling intricate joinery techniques or mastering complex designs with the support of readily available information at every stage. This empowers both beginners and seasoned craftsmen to tackle ambitious projects with ease and precision.

    Benefits Beyond Convenience

    The advantages extend beyond simple convenience. Downloadable plans often include multiple views and perspectives of the project, allowing you to visualize the final product and understand the construction process more thoroughly. Many plans also offer various skill levels, enabling you to select projects that match your current abilities and gradually progress to more challenging endeavors. This structured learning approach is invaluable for anyone looking to improve their woodworking skills steadily and confidently. Furthermore, the digital format allows for easy modification or scaling of designs to accommodate your specific needs or preferences, providing ultimate flexibility.

    Finding the Perfect Woodworking Plans for You

    The sheer volume of available woodworking plans can initially seem overwhelming. To navigate this abundance effectively, consider your skill level, available tools, and the type of project you envision. Are you a beginner seeking simple birdhouses, or an experienced craftsman tackling intricate furniture designs? This self-assessment will help you narrow your search effectively. Look for plans that clearly state their difficulty level and list the necessary tools and materials. Reputable websites and online marketplaces offer a wide range of plans categorized by skill level and project type.

    Where to Find High-Quality Plans

    Reputable sources are crucial for ensuring accurate and well-designed plans. Consider these options:

    • Established woodworking websites: Many websites specialize in providing high-quality, professionally designed plans.
    • Online marketplaces: Platforms like Etsy often feature handcrafted plans from experienced woodworkers.
    • Woodworking magazines and books: While not strictly downloadable, many magazines and books offer plans that can be easily copied and adapted for digital use.
    • Subscription services: Some services provide access to an extensive library of plans for a recurring fee.

    Always check reviews and ratings before purchasing plans to ensure quality and accuracy.

    From Download to Dream Project: A Step-by-Step Guide

    Once you've acquired your chosen plans, carefully review them before you begin. Familiarize yourself with every step of the process, ensuring you understand the assembly techniques and joinery methods involved. Gather all necessary tools and materials, ensuring that they match the plan specifications precisely. Follow the instructions meticulously, taking your time and paying attention to detail. Remember, patience and precision are key to a successful project. Celebrate your accomplishment and enjoy the satisfaction of having built something beautiful and functional with your own hands.

    Embark on your woodworking journey today. Download those plans, unleash your creativity, and experience the immense satisfaction of transforming wood into stunning works of art.

    Create a Custom Mailbox with These Woodworking Plans

    Crafting a Bespoke Wooden Mailbox: A Comprehensive Guide

    This comprehensive guide details the construction of a custom-designed wooden mailbox, providing detailed instructions and considerations for a robust and aesthetically pleasing final product. The project necessitates a moderate level of woodworking proficiency, including experience with joinery, finishing, and hardware installation. However, with careful planning and execution, even intermediate woodworkers can successfully complete this rewarding project.

    I. Design and Planning

    A. Mailbox Dimensions and Aesthetics

    Before commencing construction, meticulous planning is paramount. Begin by defining the desired dimensions of your mailbox. Consider the size of your typical mail volume, ensuring sufficient internal space while maintaining proportionality with the overall design. Standard mailbox dimensions generally range from 12 to 18 inches in height, 6 to 8 inches in width, and 10 to 12 inches in depth. However, your design may deviate significantly from these standards depending on your aesthetic preferences and the physical constraints of your location.

    The aesthetic aspect plays a crucial role. Choose a style that complements the architectural style of your home. Options range from rustic designs featuring rough-hewn wood and simple joinery to more refined styles incorporating intricate detailing and polished finishes. Sketch your design, making detailed notes of all dimensions and components. Consider the type of wood to be used; various species offer different aesthetic qualities, workability, and durability. Popular choices include cedar for its natural resistance to decay, redwood for its rich color and durability, and oak for its strength and classic appearance. The selection will greatly influence the overall cost and longevity of the project.

    B. Materials Selection and Acquisition

    Once the design is finalized, create a comprehensive materials list. This will encompass the wood itself, along with necessary hardware, fasteners, and finishing materials. The quantity of wood required will depend upon the design's complexity and dimensions. It's advisable to purchase slightly more material than initially calculated to account for potential errors or wastage during the construction process. For a sturdy mailbox, select lumber that is at least ¾ inch thick. Consider using exterior-grade plywood for the back and sides if using less durable wood for the visible surfaces.

    Hardware components include hinges, a locking mechanism (either a simple latch or a more sophisticated lock), a mounting bracket, and screws or nails appropriate for the chosen wood. The hinges should be of robust construction to withstand the frequent opening and closing of the mailbox. The locking mechanism should be chosen based on your desired level of security. Carefully consider the aesthetic compatibility of the hardware with the overall design. Finally, acquire appropriate finishing materials, such as wood sealant, primer, and exterior-grade paint or stain, ensuring compatibility with the chosen wood type.

    C. Tools and Equipment

    The necessary tools and equipment will depend on your chosen design and joinery methods. However, a basic set will include:

    • Measuring Tape and Square
    • Hand Saw or Circular Saw
    • Drill with assorted drill bits
    • Screwdriver (both Phillips and flathead)
    • Clamps
    • Sandpaper (various grits)
    • Wood Glue
    • Safety Glasses and Dust Mask
    • Wood Plane (optional, for fine adjustments)
    • Router (optional, for decorative details)

    Ensure that all tools are in good working order and that safety precautions are followed throughout the entire construction process.

    II. Construction Process

    A. Cutting and Shaping the Wood Components

    Utilizing the meticulously prepared plans, begin by cutting the individual wood components to their specified dimensions. Precise measurements are crucial to ensure a well-fitting and aesthetically pleasing final product. Use a sharp saw to achieve clean cuts, minimizing the need for excessive sanding later in the process. If using a circular saw, ensure that the saw blade is properly aligned to avoid errors and potential injuries. After cutting, use a wood plane or sandpaper to smooth any rough edges and surfaces.

    B. Assembling the Mailbox Structure

    Once all components are cut and shaped, assemble the mailbox structure. The chosen joinery method will dictate the specific steps involved. Common techniques include butt joints, dado joints, rabbet joints, or mortise and tenon joints, each offering varying levels of strength and aesthetic appeal. Apply wood glue to all joint surfaces to enhance the strength and durability of the assembly. Secure the joints using appropriate fasteners, such as screws or nails. Ensure that the joints are aligned accurately to maintain the overall dimensions and aesthetics of the mailbox. Clamps are invaluable in ensuring that the joints maintain proper alignment while the glue dries.

    C. Installing the Hinges and Locking Mechanism

    Once the mailbox structure is assembled and the glue has cured, install the hinges and locking mechanism. Precise placement of the hinges is essential for the smooth operation of the mailbox door. Use appropriate screws to secure the hinges to both the door and the main body of the mailbox. The locking mechanism should be carefully aligned and secured according to the manufacturer's instructions. Test the operation of the door to ensure a smooth and secure closure. If necessary, make adjustments to the hinge placement or the locking mechanism to optimize functionality.

    III. Finishing and Installation

    A. Surface Preparation and Finishing

    Before applying any finish, meticulously prepare the mailbox's surface. This involves sanding all surfaces to remove any imperfections, splinters, or glue residue. Start with coarser grits of sandpaper and gradually move to finer grits to achieve a smooth finish. The sanding process is crucial for ensuring proper adhesion of the finishing materials. Once the surface is perfectly smooth, apply a wood sealant to protect the wood from moisture and decay. Allow the sealant to dry completely according to the manufacturer's recommendations. Finally, apply the chosen exterior-grade paint or stain in multiple thin coats, allowing sufficient drying time between each coat.

    B. Mounting the Mailbox

    The final stage involves mounting the completed mailbox. The chosen mounting method will depend on the available space and personal preference. Common methods include mounting to a post, a wall, or a fence. Ensure that the mounting method is secure and robust enough to withstand the elements and potential impacts. Use appropriate fasteners to secure the mailbox to the mounting surface. Verify the levelness and stability of the mounted mailbox before finalizing the installation.

    IV. Conclusion

    Constructing a custom wooden mailbox is a fulfilling project that allows for creativity and personalization. By following these detailed instructions and paying close attention to detail throughout the process, you can create a beautiful and functional addition to your property. Remember that safety should always be a priority, and proper tools and techniques should be employed throughout construction. The resulting mailbox, a testament to craftsmanship and attention to detail, will not only serve its practical purpose but also enhance the aesthetic appeal of your home for years to come. Enjoy the process and the pride of creating something uniquely your own!

    Sunday, 26 January 2025

    Vintage Style Wooden Plaques

    The Enduring Allure of Vintage Style Wooden Plaques: A Collector's Perspective

    Wooden plaques, far from being mere decorative items, represent a rich tapestry of history, craftsmanship, and artistic expression. Their enduring appeal lies in their ability to seamlessly blend aesthetic beauty with tangible reminders of bygone eras. This exploration delves into the captivating world of vintage style wooden plaques, examining their historical context, the diverse range of styles and designs, the materials and techniques employed in their creation, and the burgeoning collector's market they inhabit.

    A Journey Through Time: The Historical Context of Wooden Plaques

    The use of wooden plaques as a medium for artistic expression and informational dissemination dates back centuries. From ancient civilizations utilizing wood for signage and decorative purposes to the elaborate carvings of medieval Europe, wooden plaques have played a significant role in shaping cultural landscapes. Early examples often served practical functions, such as identifying businesses or marking property boundaries. These early plaques were frequently crafted from readily available hardwoods, exhibiting simple designs and inscriptions often carved using rudimentary tools.

    The Rise of Decorative Plaques in the Victorian Era and Beyond

    The Victorian era witnessed a significant surge in the popularity of decorative wooden plaques. This period saw a blossoming of artistic styles, with intricate carvings, detailed paintings, and the incorporation of various embellishments becoming increasingly prevalent. The burgeoning middle class sought to adorn their homes with aesthetically pleasing items, and wooden plaques, with their versatility and affordability, perfectly filled this demand. Styles ranged from ornate, highly detailed pieces showcasing classical motifs to simpler, more rustic designs reflective of the Arts and Crafts movement.

    The early 20th century saw continued evolution in plaque design. Art Deco influences brought geometric patterns and streamlined aesthetics, while the mid-century modern movement embraced cleaner lines and minimalist designs. The use of different wood types also expanded, with exotic hardwoods such as mahogany and walnut gaining popularity for their rich coloration and superior durability.

    The Diverse Spectrum of Styles and Designs

    The variety of vintage style wooden plaques available today is truly remarkable. Their diverse styles reflect the evolving artistic trends and cultural influences of their respective eras. A collector can find pieces representing virtually any period, from the simplistic elegance of early American designs to the exuberant ornamentation of the Victorian era and beyond.

    Identifying Key Styles and Design Elements

    • Victorian Era Plaques: Characterized by elaborate carvings, often featuring floral motifs, cherubs, and intricate scrollwork. Materials frequently included dark, richly colored woods such as mahogany and walnut.
    • Arts and Crafts Plaques: Emphasize simplicity, functionality, and natural materials. Often feature geometric patterns, stylized floral designs, and lettering in a simple, unadorned style.
    • Art Deco Plaques: Exhibit geometric shapes, stylized designs, and a focus on symmetry and balance. The use of contrasting colors and materials was also common.
    • Mid-Century Modern Plaques: Feature clean lines, minimalist designs, and often incorporate abstract patterns and bold colors. Materials may include lighter woods such as pine or birch.
    • Nautical Plaques: Commonly depict ships, anchors, seagulls, and other maritime imagery. Often feature weathered or distressed finishes to evoke a sense of age and seafaring history.

    The Craftsmanship and Materials: A Closer Look

    The creation of vintage style wooden plaques involved a high degree of skill and craftsmanship. Many were hand-carved and hand-painted, reflecting the dedication and artistic talent of their creators. The selection of materials played a vital role in determining both the aesthetic and the durability of the finished piece.

    Wood Selection and Preparation

    The choice of wood varied depending on availability, cost, and the desired aesthetic effect. Hardwoods such as oak, mahogany, walnut, and cherry were favored for their durability and rich coloration. Softwoods like pine were sometimes used for less elaborate designs, particularly in the Arts and Crafts style.

    Before carving or painting, the wood underwent meticulous preparation. This typically involved smoothing the surface, removing imperfections, and applying a primer or sealer to ensure optimal paint adhesion and prevent warping or cracking.

    Carving Techniques and Decorative Elements

    Carving techniques ranged from simple relief carving to intricate relief carving. Relief carving involves carving the design into the surface of the wood, while bas-relief techniques produce a shallow carving. More complex pieces might incorporate inlay work, using contrasting woods or other materials to create elaborate designs. Gilding, the application of gold leaf, was also a common decorative technique, adding a touch of luxury and sophistication.

    Painting and Finishing Techniques

    Painting played a crucial role in enhancing the aesthetic appeal of many vintage plaques. Techniques ranged from simple, solid-color applications to detailed hand-painting of floral motifs, landscapes, or other decorative elements. After painting, the plaques were often finished with a protective varnish or lacquer to enhance their durability and preserve their colors.

    The Collector's Market: Appreciating and Preserving Vintage Plaques

    The collector's market for vintage style wooden plaques is thriving, with enthusiasts seeking out rare and unique pieces. The value of a plaque is determined by several factors, including its age, rarity, style, condition, and the artistic merit of its design.

    Identifying Authenticity and Value

    Authenticating vintage plaques requires careful examination. Look for signs of age and wear, including minor imperfections, variations in paint or finish, and evidence of hand-craftsmanship. Researching similar plaques and comparing them to known examples can also assist in determining authenticity and approximate value.

    Caring for and Preserving Vintage Plaques

    Proper care and preservation are essential to maintaining the beauty and value of vintage plaques. Avoid exposing them to direct sunlight or extreme temperatures, as this can lead to fading or warping. Regular dusting is recommended, and any cleaning should be done gently with a soft cloth and appropriate cleaning solutions.

    The Ongoing Appeal of Wooden Plaques

    Vintage style wooden plaques offer a unique blend of artistry, history, and tangible charm. Their ability to evoke a sense of nostalgia and connect us to bygone eras ensures their enduring appeal. For collectors and enthusiasts alike, the pursuit of these captivating pieces offers a journey into the past, a celebration of craftsmanship, and a chance to own a piece of history.

    Saturday, 25 January 2025

    Beginner's Guide to Making a Cutting Board with a Juice Groove for Beginners

    A Beginner's Guide to Crafting a Cutting Board with Juice Groove

    This comprehensive guide provides a step-by-step instruction for novice woodworkers interested in creating their own cutting board, complete with a crucial juice groove to contain liquids and prevent messes. We will cover material selection, tool preparation, safe woodworking practices, and finishing techniques, ensuring a safe and rewarding experience.

    I. Material Selection and Preparation

    A. Choosing Your Wood

    The selection of wood is paramount in creating a durable and aesthetically pleasing cutting board. Hardwoods are strongly recommended due to their inherent density and resistance to wear and tear. Popular choices include:

    • Maple: A classic choice, known for its hardness, light color, and relative ease of working.
    • Cherry: Offers beautiful reddish-brown tones that deepen with age, but is slightly softer than maple.
    • Walnut: A rich, dark-colored wood that is both hard and visually striking. Can be more challenging to work with due to its density.
    • Hardwoods such as Oak or Beech: equally suitable for the project. Note that denser woods take longer to cut and shape and may require higher powered tools

    Avoid softwoods like pine or fir, as they are prone to damage and may splinter easily during use. Ensure your chosen wood is properly dried (less than 8% moisture content) to prevent warping or cracking after the board is constructed. Kiln-dried lumber is highly recommended for this project.

    B. Preparing the Wood

    Before beginning the construction, carefully examine your wood for any knots, cracks, or other imperfections that could compromise the board's integrity. Plan your cuts to minimize these defects. The dimensions of the wood should be decided upon based on the desired dimensions of your cutting board, adding extra material to accommodate for the juice groove and any waste during shaping.

    Use a jointer or hand plane to create perfectly flat and smooth surfaces on all pieces of lumber. This step is crucial for achieving a strong glue bond and ensuring a level cutting surface. If you lack access to a jointer, carefully use a high-quality hand plane and take your time achieving a flat surface. Thoroughly clean and sand the lumber with gradually finer grits of sandpaper (e.g., 80, 120, 220 grit) to remove any splinters or imperfections. Finish with a fine grit sanding of 320 or higher for optimum smoothness.

    II. Constructing the Cutting Board

    A. Gluing the Wood

    Depending on your desired thickness and size of the cutting board, you may need to glue multiple pieces of wood together to build up the desired height and width. Apply a high-quality wood glue liberally to the surfaces to be joined. Use clamps to firmly secure the pieces together, ensuring even pressure across the entire joint. Allow the glue to dry completely according to the manufacturer's instructions, typically 24 hours.

    B. Cutting the Juice Groove

    Once the glue is completely dry, it's time to cut the juice groove. This is best done using a router with a straight bit or a router plane. Plan the position and depth of the groove carefully. It should be approximately ½ inch (12 mm) wide and ¼ inch (6 mm) deep. Use a pencil to carefully mark the outline of the groove on the board's surface. Use a straight edge for guidance if a router is to be used. It is advisable to use a sacrificial piece of wood (typically plywood) underneath the workpiece. This will protect your workbench and help guide your router and keep a consistent depth. If using a router plane, ensure that you can use this tool safely.

    Work slowly and methodically, making multiple passes to achieve the desired depth without tearing the wood. If you are uncomfortable working with a router, you can achieve a similar result with a hand saw and chisel, though this will be more time-consuming and require more skill.

    C. Shaping and Finishing the Cutting Board

    After creating the juice groove, use a hand plane or a belt sander to smooth any uneven surfaces and refine the overall shape of your cutting board. Pay attention to the corners and edges to ensure they are rounded or chamfered for comfort and safety.

    Sand the entire cutting board using increasingly fine grits of sandpaper (e.g., 80, 120, 220 grit, and finally 320 grit or higher for a very smooth finish). Always sand in the direction of the wood grain to prevent scratches.

    III. Finishing the Cutting Board

    A. Choosing a Finish

    The finish you choose is crucial for both the aesthetics and durability of your cutting board. Several options exist, each with its pros and cons:

    • Mineral Oil: A food-safe option that penetrates the wood, enhancing its natural beauty and providing some protection. Requires regular reapplication.
    • Mineral Oil and Beeswax: Combines the benefits of mineral oil with the added protection and sheen of beeswax. Creates a slightly harder surface than mineral oil alone.
    • Cutting Board Oil: specifically formulated to be food-safe and durable, some are designed to be a one time application and others will require periodic reapplication.

    Avoid using polyurethane or other varnish-type finishes on cutting boards, as these can chip and peel over time and may not be food-safe.

    B. Applying the Finish

    Apply the chosen finish liberally, rubbing it into the wood with a clean cloth or brush. Let it soak in for several minutes, then wipe off any excess. Allow the finish to cure completely according to the manufacturer's instructions. Multiple coats may be necessary for optimal protection and water resistance. It is usually recommended that you allow at least 24 hrs between coats. Before using the cutting board, make sure you follow instructions regarding when it is safe to use. It may require curing time after the final coat.

    IV. Safety Precautions

    Woodworking can be dangerous if proper safety measures are not followed. Always wear appropriate safety glasses or a face shield to protect your eyes from flying debris. Use hearing protection when operating power tools. Ensure the work area is well-lit and clutter-free. Keep your fingers clear of cutting tools and use push sticks or other aids to minimize the risk of injury. Never rush the process. Take your time and be methodical in your approach. If you are unsure of any step, consult more experienced woodworkers or online resources before proceeding. Remember, safety is always paramount.

    By following these instructions carefully, you can successfully craft a beautiful and functional cutting board with a juice groove. Remember that practice makes perfect, and your skills will improve with each project. Enjoy the process of creating something unique and useful for your kitchen!