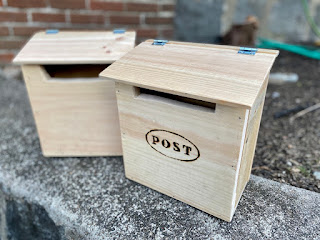
Crafting a Bespoke Wooden Mailbox: A Comprehensive Guide
This comprehensive guide details the construction of a custom-designed wooden mailbox, providing detailed instructions and considerations for a robust and aesthetically pleasing final product. The project necessitates a moderate level of woodworking proficiency, including experience with joinery, finishing, and hardware installation. However, with careful planning and execution, even intermediate woodworkers can successfully complete this rewarding project.
I. Design and Planning

A. Mailbox Dimensions and Aesthetics
Before commencing construction, meticulous planning is paramount. Begin by defining the desired dimensions of your mailbox. Consider the size of your typical mail volume, ensuring sufficient internal space while maintaining proportionality with the overall design. Standard mailbox dimensions generally range from 12 to 18 inches in height, 6 to 8 inches in width, and 10 to 12 inches in depth. However, your design may deviate significantly from these standards depending on your aesthetic preferences and the physical constraints of your location.
The aesthetic aspect plays a crucial role. Choose a style that complements the architectural style of your home. Options range from rustic designs featuring rough-hewn wood and simple joinery to more refined styles incorporating intricate detailing and polished finishes. Sketch your design, making detailed notes of all dimensions and components. Consider the type of wood to be used; various species offer different aesthetic qualities, workability, and durability. Popular choices include cedar for its natural resistance to decay, redwood for its rich color and durability, and oak for its strength and classic appearance. The selection will greatly influence the overall cost and longevity of the project.
B. Materials Selection and Acquisition
Once the design is finalized, create a comprehensive materials list. This will encompass the wood itself, along with necessary hardware, fasteners, and finishing materials. The quantity of wood required will depend upon the design's complexity and dimensions. It's advisable to purchase slightly more material than initially calculated to account for potential errors or wastage during the construction process. For a sturdy mailbox, select lumber that is at least ¾ inch thick. Consider using exterior-grade plywood for the back and sides if using less durable wood for the visible surfaces.
Hardware components include hinges, a locking mechanism (either a simple latch or a more sophisticated lock), a mounting bracket, and screws or nails appropriate for the chosen wood. The hinges should be of robust construction to withstand the frequent opening and closing of the mailbox. The locking mechanism should be chosen based on your desired level of security. Carefully consider the aesthetic compatibility of the hardware with the overall design. Finally, acquire appropriate finishing materials, such as wood sealant, primer, and exterior-grade paint or stain, ensuring compatibility with the chosen wood type.
C. Tools and Equipment
The necessary tools and equipment will depend on your chosen design and joinery methods. However, a basic set will include:
- Measuring Tape and Square
- Hand Saw or Circular Saw
- Drill with assorted drill bits
- Screwdriver (both Phillips and flathead)
- Clamps
- Sandpaper (various grits)
- Wood Glue
- Safety Glasses and Dust Mask
- Wood Plane (optional, for fine adjustments)
- Router (optional, for decorative details)
Ensure that all tools are in good working order and that safety precautions are followed throughout the entire construction process.
II. Construction Process
A. Cutting and Shaping the Wood Components
Utilizing the meticulously prepared plans, begin by cutting the individual wood components to their specified dimensions. Precise measurements are crucial to ensure a well-fitting and aesthetically pleasing final product. Use a sharp saw to achieve clean cuts, minimizing the need for excessive sanding later in the process. If using a circular saw, ensure that the saw blade is properly aligned to avoid errors and potential injuries. After cutting, use a wood plane or sandpaper to smooth any rough edges and surfaces.
B. Assembling the Mailbox Structure
Once all components are cut and shaped, assemble the mailbox structure. The chosen joinery method will dictate the specific steps involved. Common techniques include butt joints, dado joints, rabbet joints, or mortise and tenon joints, each offering varying levels of strength and aesthetic appeal. Apply wood glue to all joint surfaces to enhance the strength and durability of the assembly. Secure the joints using appropriate fasteners, such as screws or nails. Ensure that the joints are aligned accurately to maintain the overall dimensions and aesthetics of the mailbox. Clamps are invaluable in ensuring that the joints maintain proper alignment while the glue dries.
C. Installing the Hinges and Locking Mechanism
Once the mailbox structure is assembled and the glue has cured, install the hinges and locking mechanism. Precise placement of the hinges is essential for the smooth operation of the mailbox door. Use appropriate screws to secure the hinges to both the door and the main body of the mailbox. The locking mechanism should be carefully aligned and secured according to the manufacturer's instructions. Test the operation of the door to ensure a smooth and secure closure. If necessary, make adjustments to the hinge placement or the locking mechanism to optimize functionality.
III. Finishing and Installation
A. Surface Preparation and Finishing
Before applying any finish, meticulously prepare the mailbox's surface. This involves sanding all surfaces to remove any imperfections, splinters, or glue residue. Start with coarser grits of sandpaper and gradually move to finer grits to achieve a smooth finish. The sanding process is crucial for ensuring proper adhesion of the finishing materials. Once the surface is perfectly smooth, apply a wood sealant to protect the wood from moisture and decay. Allow the sealant to dry completely according to the manufacturer's recommendations. Finally, apply the chosen exterior-grade paint or stain in multiple thin coats, allowing sufficient drying time between each coat.
B. Mounting the Mailbox
The final stage involves mounting the completed mailbox. The chosen mounting method will depend on the available space and personal preference. Common methods include mounting to a post, a wall, or a fence. Ensure that the mounting method is secure and robust enough to withstand the elements and potential impacts. Use appropriate fasteners to secure the mailbox to the mounting surface. Verify the levelness and stability of the mounted mailbox before finalizing the installation.
IV. Conclusion
Constructing a custom wooden mailbox is a fulfilling project that allows for creativity and personalization. By following these detailed instructions and paying close attention to detail throughout the process, you can create a beautiful and functional addition to your property. Remember that safety should always be a priority, and proper tools and techniques should be employed throughout construction. The resulting mailbox, a testament to craftsmanship and attention to detail, will not only serve its practical purpose but also enhance the aesthetic appeal of your home for years to come. Enjoy the process and the pride of creating something uniquely your own!
0 comments:
Post a Comment