Saturday, 25 January 2025

Beginner's Guide to Making a Cutting Board with a Juice Groove for Beginners

A Beginner's Guide to Crafting a Cutting Board with Juice Groove

This comprehensive guide provides a step-by-step instruction for novice woodworkers interested in creating their own cutting board, complete with a crucial juice groove to contain liquids and prevent messes. We will cover material selection, tool preparation, safe woodworking practices, and finishing techniques, ensuring a safe and rewarding experience.

I. Material Selection and Preparation

A. Choosing Your Wood

The selection of wood is paramount in creating a durable and aesthetically pleasing cutting board. Hardwoods are strongly recommended due to their inherent density and resistance to wear and tear. Popular choices include:

  • Maple: A classic choice, known for its hardness, light color, and relative ease of working.
  • Cherry: Offers beautiful reddish-brown tones that deepen with age, but is slightly softer than maple.
  • Walnut: A rich, dark-colored wood that is both hard and visually striking. Can be more challenging to work with due to its density.
  • Hardwoods such as Oak or Beech: equally suitable for the project. Note that denser woods take longer to cut and shape and may require higher powered tools

Avoid softwoods like pine or fir, as they are prone to damage and may splinter easily during use. Ensure your chosen wood is properly dried (less than 8% moisture content) to prevent warping or cracking after the board is constructed. Kiln-dried lumber is highly recommended for this project.

B. Preparing the Wood

Before beginning the construction, carefully examine your wood for any knots, cracks, or other imperfections that could compromise the board's integrity. Plan your cuts to minimize these defects. The dimensions of the wood should be decided upon based on the desired dimensions of your cutting board, adding extra material to accommodate for the juice groove and any waste during shaping.

Use a jointer or hand plane to create perfectly flat and smooth surfaces on all pieces of lumber. This step is crucial for achieving a strong glue bond and ensuring a level cutting surface. If you lack access to a jointer, carefully use a high-quality hand plane and take your time achieving a flat surface. Thoroughly clean and sand the lumber with gradually finer grits of sandpaper (e.g., 80, 120, 220 grit) to remove any splinters or imperfections. Finish with a fine grit sanding of 320 or higher for optimum smoothness.

II. Constructing the Cutting Board

A. Gluing the Wood

Depending on your desired thickness and size of the cutting board, you may need to glue multiple pieces of wood together to build up the desired height and width. Apply a high-quality wood glue liberally to the surfaces to be joined. Use clamps to firmly secure the pieces together, ensuring even pressure across the entire joint. Allow the glue to dry completely according to the manufacturer's instructions, typically 24 hours.

B. Cutting the Juice Groove

Once the glue is completely dry, it's time to cut the juice groove. This is best done using a router with a straight bit or a router plane. Plan the position and depth of the groove carefully. It should be approximately ½ inch (12 mm) wide and ¼ inch (6 mm) deep. Use a pencil to carefully mark the outline of the groove on the board's surface. Use a straight edge for guidance if a router is to be used. It is advisable to use a sacrificial piece of wood (typically plywood) underneath the workpiece. This will protect your workbench and help guide your router and keep a consistent depth. If using a router plane, ensure that you can use this tool safely.

Work slowly and methodically, making multiple passes to achieve the desired depth without tearing the wood. If you are uncomfortable working with a router, you can achieve a similar result with a hand saw and chisel, though this will be more time-consuming and require more skill.

C. Shaping and Finishing the Cutting Board

After creating the juice groove, use a hand plane or a belt sander to smooth any uneven surfaces and refine the overall shape of your cutting board. Pay attention to the corners and edges to ensure they are rounded or chamfered for comfort and safety.

Sand the entire cutting board using increasingly fine grits of sandpaper (e.g., 80, 120, 220 grit, and finally 320 grit or higher for a very smooth finish). Always sand in the direction of the wood grain to prevent scratches.

III. Finishing the Cutting Board

A. Choosing a Finish

The finish you choose is crucial for both the aesthetics and durability of your cutting board. Several options exist, each with its pros and cons:

  • Mineral Oil: A food-safe option that penetrates the wood, enhancing its natural beauty and providing some protection. Requires regular reapplication.
  • Mineral Oil and Beeswax: Combines the benefits of mineral oil with the added protection and sheen of beeswax. Creates a slightly harder surface than mineral oil alone.
  • Cutting Board Oil: specifically formulated to be food-safe and durable, some are designed to be a one time application and others will require periodic reapplication.

Avoid using polyurethane or other varnish-type finishes on cutting boards, as these can chip and peel over time and may not be food-safe.

B. Applying the Finish

Apply the chosen finish liberally, rubbing it into the wood with a clean cloth or brush. Let it soak in for several minutes, then wipe off any excess. Allow the finish to cure completely according to the manufacturer's instructions. Multiple coats may be necessary for optimal protection and water resistance. It is usually recommended that you allow at least 24 hrs between coats. Before using the cutting board, make sure you follow instructions regarding when it is safe to use. It may require curing time after the final coat.

IV. Safety Precautions

Woodworking can be dangerous if proper safety measures are not followed. Always wear appropriate safety glasses or a face shield to protect your eyes from flying debris. Use hearing protection when operating power tools. Ensure the work area is well-lit and clutter-free. Keep your fingers clear of cutting tools and use push sticks or other aids to minimize the risk of injury. Never rush the process. Take your time and be methodical in your approach. If you are unsure of any step, consult more experienced woodworkers or online resources before proceeding. Remember, safety is always paramount.

By following these instructions carefully, you can successfully craft a beautiful and functional cutting board with a juice groove. Remember that practice makes perfect, and your skills will improve with each project. Enjoy the process of creating something unique and useful for your kitchen!
Wednesday, 20 November 2024

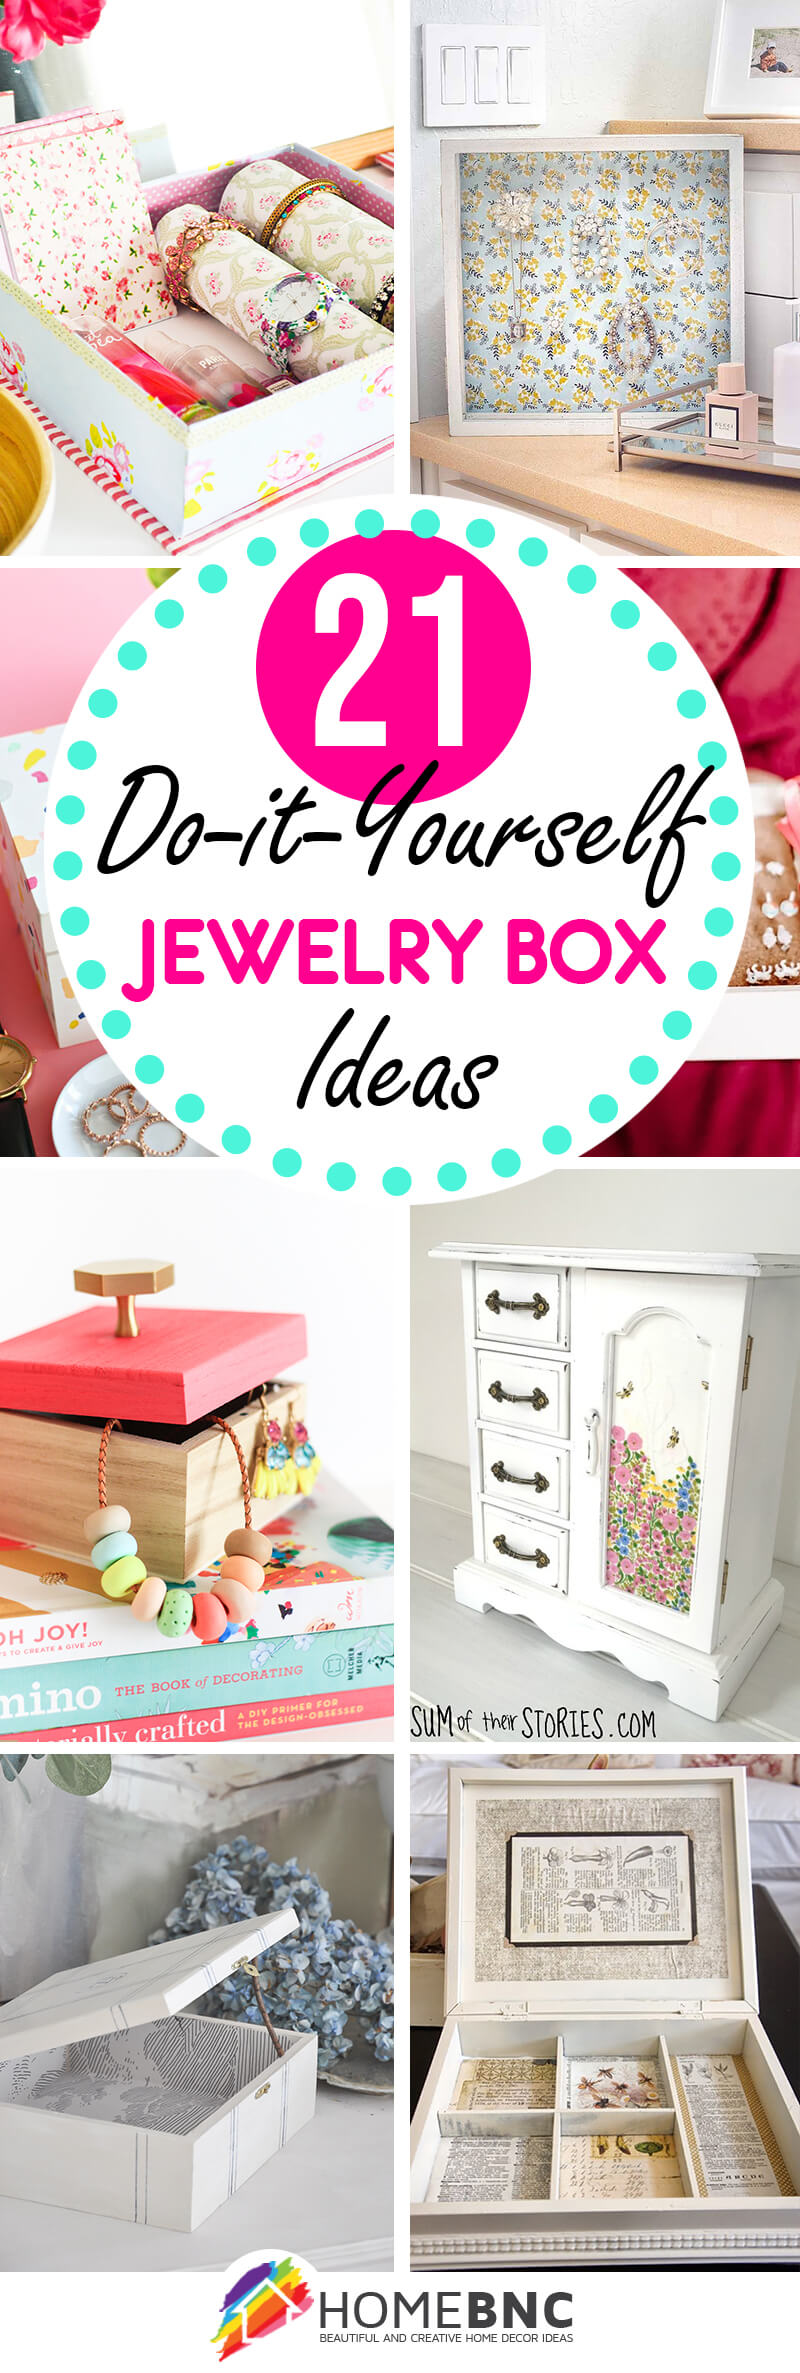
Jewelry Box Projects for Organizing and Storing Jewelry in Style

Jewelry Box Projects for Organizing and Storing Jewelry in Style

Jewelry Box Projects: Organize and Store Your Treasures in Style

Tired of tangled necklaces and misplaced earrings? Transform your jewelry storage from chaotic mess to elegant display with these inspiring DIY jewelry box projects. Whether you prefer a rustic charm or a sleek modern aesthetic, these projects offer a unique blend of functionality and style, allowing you to showcase your beloved pieces while keeping them safe and organized. Get ready to unleash your creativity and enjoy the satisfying process of crafting the perfect jewelry storage solution tailored to your taste.

Repurposing for a Unique Touch

Don't underestimate the potential of repurposed items! Give old cigar boxes, vintage wooden crates, or even pretty tea tins a new life as stunning jewelry organizers. A simple coat of paint, some decoupage, or a layer of textured fabric can completely transform these humble containers. Consider adding dividers made from repurposed cardboard or felt to create compartments for rings, earrings, and bracelets. This method not only offers a sustainable approach to crafting but also adds a unique, vintage feel to your jewelry storage. The inherent imperfections and history of the repurposed material will give your jewelry box a one-of-a-kind character.

Adding Personal Touches

Personalize your repurposed jewelry box by adding embellishments that reflect your style. Incorporate decorative knobs, vintage buttons, or even small mirrors to add an extra layer of charm. You can also personalize it with your initials or a favorite quote using paint pens or stencils. Don't be afraid to experiment with different textures and patterns. The key is to have fun and let your personality shine through in your unique creation.

Building from Scratch: A Customizable Approach

For complete control over the design and size of your jewelry box, building one from scratch offers unparalleled customization. Choose from a variety of materials, including wood, fabric, or even upcycled materials like pallets. A simple wooden box can be enhanced with decorative hinges and latches, creating a sophisticated and functional piece. Consider incorporating compartments of varying sizes to accommodate different types of jewelry. This allows you to customize your jewelry box to match the size and shape of your collection, ensuring everything has its designated place.

Essential Tools and Materials

Before you begin, gather your necessary tools and materials. This might include:

  • Wood (for wooden boxes)
  • Fabric (for fabric-covered boxes)
  • Saw (for cutting wood)
  • Glue
  • Screws and hinges
  • Paint and brushes
  • Decorative elements (buttons, knobs, etc.)
  • Measuring tape and pencil

Creative Storage Solutions Within Your Box

Maximize your jewelry box's storage capacity with clever interior designs. Use fabric-covered dividers to separate necklaces and prevent tangling. Employ small trays or compartments for rings and earrings, ensuring easy access and visibility. Consider adding a small mirror to the inside of the lid for convenient application of makeup or jewelry adjustment. Even repurposed items like egg cartons or spice racks can find a new purpose as ingenious storage solutions within your custom-designed box, offering a unique and functional touch.

Protecting Your Precious Pieces

Protecting your jewelry is paramount. Line your jewelry box with soft fabric like velvet or felt to prevent scratches and tarnish. This added layer of protection will keep your jewelry looking its best for years to come. For particularly delicate pieces, consider using individual fabric pouches or felt inserts for extra security.

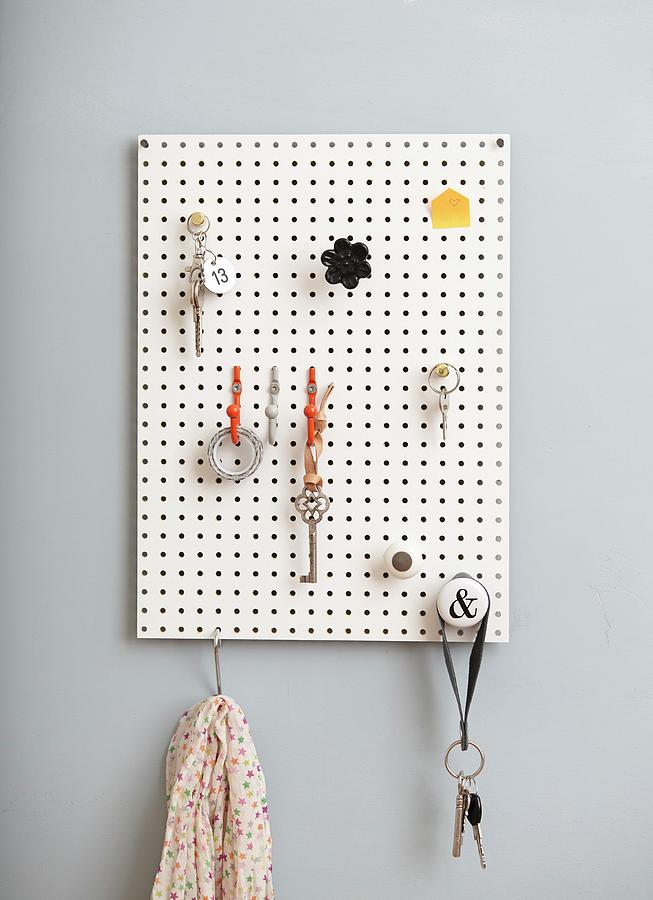
DIY Key Racks with Customizable Hooks and Features for Extra Appeal

DIY Key Racks with Customizable Hooks and Features for Extra Appeal

DIY Key Racks with Customizable Hooks and Features for Extra Appeal

Tired of losing your keys in the abyss of your entryway? A key rack can be a lifesaver, providing a designated spot for your keys and other small items. But why settle for a boring, generic key rack when you can create a personalized masterpiece? This article will guide you through building a DIY key rack with customizable hooks and features, adding a touch of flair to your home while keeping your keys organized.

Choosing Your Base

The foundation of your key rack sets the tone for its style. Opt for a material that resonates with your home's aesthetic and suits your desired functionality.

Wood

Wood is a timeless choice, offering warmth and versatility. You can use reclaimed wood for a rustic look or opt for polished wood for a modern feel. Explore different wood types like oak, pine, or maple to match your preference.

Metal

Metal provides a sleek, industrial vibe. Choose from various metals like steel, iron, or copper. A metal base can be painted or left bare to complement your home's color scheme.

Upcycled Materials

Get creative by using salvaged items like an old window frame or a vintage toolbox. Upcycled materials add character and sustainability to your project.

Planning the Hooks

Customizable hooks are the stars of the show! Choose from a wide range of materials, sizes, and shapes to suit your needs and style.

Hook Materials

Consider using:

  • Metal hooks: These offer durability and a modern aesthetic.
  • Wooden hooks: Bring a natural, rustic charm to your key rack.
  • Ceramic hooks: Add a touch of whimsy and personality.
  • Upcycled hooks: Transform vintage door knobs, coat hooks, or even silverware into unique hooks.

Hook Placement and Arrangement

Think about the items you'll be hanging on your rack. Arrange the hooks to accommodate your needs. For instance, you might want dedicated hooks for keys, sunglasses, dog leashes, and mail.

Adding Extra Appeal

Boost the appeal of your key rack with customizable features that enhance its functionality and aesthetics.

Storage compartments

Incorporate small shelves or drawers for storing loose change, mail, or other small items. These compartments can be built into the base or added separately.

Lighting

Install small lights like LED strips or a decorative bulb to illuminate the rack and create a welcoming ambiance.

Decorative elements

Add decorative touches such as stencils, paint, or fabric to personalize your key rack and match your decor. You can even incorporate family photos or artwork to make it truly unique.

Getting Started

Once you have your materials and plan in place, you're ready to build! For woodworking projects, use a saw, drill, sandpaper, and wood glue. Metal projects might require welding, cutting, and drilling. Remember to measure carefully and take your time to ensure a well-crafted result.

Conclusion

A DIY key rack offers endless possibilities for customization and personalization. With a little creativity and effort, you can craft a functional and stylish piece that reflects your personality and adds character to your home. Enjoy the process and have fun creating your own one-of-a-kind key rack!

Tuesday, 19 November 2024

DIY Wooden Ornaments for Your Christmas Tree

DIY Wooden Ornaments for Your Christmas Tree

DIY Wooden Ornaments for Your Christmas Tree: Add Rustic Charm to Your Holiday Decor

Looking for a way to personalize your Christmas tree and add a touch of rustic charm? Look no further than DIY wooden ornaments! These simple yet elegant decorations are a delightful way to express your creativity and bring warmth to your holiday decor. You can create ornaments that reflect your personal style, from whimsical animal shapes to elegant snowflakes, and even personalize them with names, dates, or special messages.

Gathering Your Supplies

The beauty of DIY wooden ornaments lies in their simplicity. You don't need a lot of fancy equipment or materials. Start by gathering these essential supplies:

  • Wooden cutouts: These come in various shapes and sizes, from classic circles and stars to unique animal silhouettes. You can find them at craft stores, online retailers, or even reuse scrap wood.
  • Paint: Choose acrylic paints in your favorite colors for a bright and cheerful look. You can also experiment with metallic paints for a touch of glamour.
  • Paintbrushes: Select a variety of brush sizes to create details and cover larger areas.
  • Twine or ribbon: This will be used to hang your ornaments.
  • Optional embellishments: Let your creativity flow! Consider adding glitter, sequins, buttons, or other decorative elements to make your ornaments truly unique.

Creating Your Wooden Ornaments

Now that you have your supplies, it's time to unleash your creativity! Here's a step-by-step guide to creating your wooden ornaments:

Step 1: Prep Your Wooden Cutouts

Start by sanding your wooden cutouts to create a smooth surface for painting. This helps prevent the paint from clumping or peeling. You can use sandpaper or a sanding block to smooth out any rough edges.

Step 2: Get Creative with Paint

Now comes the fun part! Paint your wooden cutouts with your chosen colors. If you're using multiple colors, let each layer dry completely before applying the next. For a rustic look, apply a thin layer of paint and let some of the wood grain show through. If you're going for a more polished look, cover the wood completely with paint.

Step 3: Add Embellishments

This is where you can truly personalize your ornaments. Add glitter, sequins, buttons, or other decorative elements to create your desired look. Be creative and experiment with different textures and colors.

Step 4: Attach Hanging Strings

Use your twine or ribbon to create a loop for hanging your ornaments. You can tie a simple knot or use a hole punch to create a hanging hole. Add a decorative touch by using a piece of ribbon that complements the ornament's colors.

Displaying Your Ornaments

Once your DIY wooden ornaments are complete, admire your handiwork! Hang them on your Christmas tree, place them on your mantel, or use them to decorate your gift packages. These handcrafted treasures will add a special touch to your holiday decor and bring warmth to your home.

Conclusion

Creating DIY wooden ornaments is a fun and rewarding activity that allows you to express your creativity and personalize your holiday decor. With a little time and effort, you can create beautiful and unique ornaments that will be treasured for years to come. So gather your supplies, let your imagination run wild, and create some magical Christmas decorations!

Monday, 18 November 2024

How to Cut Dado Joints with a Circular Saw

How to Cut Dado Joints with a Circular Saw

Cutting Dado Joints with a Circular Saw

Dado joints are a classic woodworking technique that creates a strong, flush connection between two pieces of wood. They are often used to create shelves, drawers, and other furniture components. While dado joints are traditionally cut with a table saw, you can achieve precise and professional results using a circular saw with a little planning and attention to detail.

Preparation is Key

Before you even pick up your saw, there are a few essential steps to ensure a successful dado joint. First, select the correct blade for the job. A dado blade set, consisting of two outer blades and a center blade, is specifically designed for cutting dados. Alternatively, you can use a standard saw blade with a thin kerf for precise cuts. Next, accurately mark the location of the dado on your workpiece. Use a pencil, combination square, and a straightedge to draw clear lines.

Setting Up Your Workpiece

To achieve perfectly aligned dado joints, you'll need to secure your workpiece firmly. Clamping it to a workbench or using a sawhorse with a piece of plywood as a stable base is recommended. Ensure your workpiece is flat and level to prevent any inconsistencies in your cuts.

Making the Cuts

With your workpiece securely in place, you're ready to start cutting. Follow these steps:

  1. Position the circular saw along the marked line for the dado's depth.
  2. Using a guide rail or straightedge, set the saw to the desired depth. For a clean cut, ensure the guide rail is flush with the workpiece.
  3. Make the first cut, slowly and steadily guiding the saw along the line.
  4. Without lifting the saw, adjust its position to the width of the dado, and make your second cut parallel to the first.
  5. Carefully remove the waste wood from the dado, ensuring not to damage the edges.
  6. If required, use a chisel or router to clean up any rough edges.

Tips for Success

Here are a few extra tips to help you achieve perfectly cut dado joints:

  1. Use a guide rail: For precise and straight cuts, consider using a guide rail with your circular saw. This will help you keep your cuts consistent and prevent any wandering.
  2. Practice on scrap wood: Familiarize yourself with your circular saw and the techniques of dado cutting by practicing on scrap wood before cutting your final project.
  3. Be mindful of blade depth: Make sure your saw blade is set to the correct depth for the dado. A shallow cut won't result in a strong joint, while an overly deep cut can damage the workpiece.
  4. Go slowly: Avoid rushing your cuts. Slowly and steadily guide the circular saw to ensure clean and accurate results.

Cutting dado joints with a circular saw can be a great alternative to using a table saw. With the right preparation, tools, and techniques, you can achieve strong, precise joints that will enhance your woodworking projects.

Wednesday, 13 November 2024

How to Create Dado Joints for Perfect Shelf Installations

How to Create Dado Joints for Perfect Shelf Installations

How to Create Dado Joints for Perfect Shelf Installations

Hey there, fellow DIYer! Ever looked at a wobbly shelf and thought, "There has to be a better way?" Well, there is! Enter the dado joint, a simple yet powerful woodworking technique that'll give your shelves the strength and stability they deserve.

Think of a dado joint as a "slot" cut into the side of a piece of wood. This slot is precisely sized to perfectly accommodate the thickness of your shelf. When you slip the shelf into the dado, you're creating a strong, secure connection that's much more robust than a simple nail or screw.

Why Choose Dado Joints?

Okay, so you're convinced dado joints are cool. But why are they so great, you ask? Let's break down the benefits:

  • Unbeatable Strength: Dado joints are designed to distribute weight evenly across the shelf, minimizing sagging and wobbles. Think of it like a sturdy foundation for your shelves!
  • Sleek Aesthetics: Unlike visible screws or nails, dado joints create a seamless, clean look. Your shelves will blend seamlessly with the surrounding structure, making your projects look more polished and professional.
  • Long-Lasting Durability: A well-made dado joint is incredibly strong and durable, ensuring your shelves stay stable and secure for years to come.
  • Easy to Assemble and Disassemble: While dado joints are strong, they're also relatively easy to assemble and disassemble. If you need to adjust your shelf setup or make changes, you can easily remove the shelves without damaging the structure.

Tools You'll Need

Before you jump into creating dado joints, make sure you've got the right tools for the job. Here's a list of essentials:

  • Table Saw: A table saw is the go-to tool for making precise dado cuts. It provides the control and accuracy you need for a perfect fit.
  • Dado Stack: This specialized set of saw blades creates the groove (or dado) in your wood. Look for a dado stack with blades that offer the desired width and depth for your project.
  • Circular Saw: If you don't have a table saw, a circular saw can also be used for creating dados. Just be sure to use a guide to ensure straight and accurate cuts.
  • Router: For more intricate dados or smaller projects, a router can be a great option. You'll need a dado-cutting router bit and a router table to make the cuts.
  • Measuring Tape: Accuracy is key! Use a measuring tape to carefully determine the dimensions of your dado and the thickness of your shelf.
  • Pencil: For marking your cut lines on the wood.
  • Safety Gear: Always wear safety glasses, hearing protection, and a dust mask when working with power tools.

Step-by-Step Guide to Making Dado Joints

Ready to dive in? Let's create those perfect dado joints!

1. Prepare Your Wood

  • Choose the right wood: Consider the type of wood you'll be using for both the shelf and the sides where you'll be creating the dados. Make sure the wood is stable and suitable for your project.
  • Measure twice, cut once: Carefully measure the width of your shelf and mark the corresponding width on the sides where you'll be creating the dado. You'll need to cut a groove that's exactly the width of your shelf.
  • Cut to size: Cut the pieces of wood that will form the sides of your shelf unit to the desired length. Ensure all cuts are clean and precise.

2. Setting Up Your Table Saw

If you're using a table saw, set it up for safety and accuracy:

  • Install your dado stack: Follow the manufacturer's instructions for installing your dado stack on the table saw.
  • Adjust the blade height: Set the blade height to the thickness of your shelf. Remember, the dado needs to be deep enough to hold your shelf securely.
  • Adjust the fence: Set the fence distance to the desired width of your dado (the width of your shelf). Make sure the fence is locked and secure.
  • Use a push stick: A push stick will help you safely guide the wood through the table saw and prevent your fingers from coming near the blade.

3. Cutting the Dado

Now for the fun part!

  • Make the first cut: Position the wood against the fence, making sure your marked line is aligned with the blade. Use a slow, controlled motion to guide the wood through the saw. It's essential to be precise at this step, as this initial cut determines the entire dado.
  • Make the second cut: Once you've completed the first cut, flip the wood over and repeat the process on the opposite side. This will create the groove for your shelf.
  • Clean up the edges: After making the dado cuts, use sandpaper to smooth out any rough edges and ensure a smooth surface for your shelf to rest on.

4. Assembling Your Shelf

Finally, the moment of truth. You've created your dado joints, now let's assemble the shelf!

  • Align your pieces: Carefully place your shelf into the dado groove you've created. Ensure it fits snugly and sits flush with the sides of the shelf unit.
  • Secure the shelf: To ensure your shelf stays secure, you can use wood glue to create a strong bond between the shelf and the sides. If needed, you can also reinforce the connection with wood screws from the underside, but make sure they're counter-sunk to maintain a clean look.

Tips and Tricks

Here are a few extra tips to help you create professional-looking dado joints:

  • Practice: If you're new to dado joints, practice on scrap wood first. Get a feel for the tool and the process before tackling your project.
  • Go slow and steady: Don't rush the process! Take your time, especially when making the initial cuts on your table saw.
  • Clean your tools: Keep your dado stack and table saw clean and free of sawdust. This ensures smooth and accurate cuts.
  • Check your fit: Before you start cutting, test your dado stack to make sure it creates a groove that's the exact width of your shelf.
  • Use a miter gauge: A miter gauge will help you make precise and consistent cuts on your table saw. It'll keep your dado straight and symmetrical.
  • Consider a dado jig: If you need to create multiple dados in different locations, a dado jig can help you make quick and easy cuts. These jigs provide accurate alignment and help prevent mistakes.

Beyond Shelves: Expanding Your Dado Joint Skills

Once you've mastered the basics of dado joints, you can use this versatile technique for a wide range of woodworking projects! Here are a few ideas:

  • Drawer Construction: Create strong and sturdy drawer boxes with dado joints that hold the sides together.
  • Table Tops: Create a robust and durable table top by joining planks together with dado joints.
  • Picture Frames: Give your picture frames a professional look with dado joints that hold the frame pieces together.
  • Custom Furniture: Use dado joints to construct intricate furniture pieces, like bookcases, cabinets, and desks. The possibilities are endless!

So there you have it! Dado joints are a game-changer for building strong and beautiful shelves and other woodworking projects. Don't be afraid to experiment and have fun with it. You'll be amazed at what you can create with this versatile woodworking technique!

Tuesday, 12 November 2024

How to Make a Firewood Rack from Pallets for Outdoor Storage

How to Make a Firewood Rack from Pallets for Outdoor Storage

Build a Firewood Rack from Pallets for Outdoor Storage

Winter is coming, and you're probably thinking about getting your fireplace ready. But where will you store all that firewood? Don't worry, you don't need to buy an expensive rack. With a few simple tools and some leftover pallets, you can easily build a sturdy and stylish firewood rack yourself. Building a firewood rack from pallets is an excellent way to save money and upcycle materials, and it's an excellent project for beginners.

Here's what you'll need to get started:

Materials

  • Two standard pallets (make sure they're sturdy and free of any loose nails or splinters)
  • A circular saw or hand saw
  • A drill with a drill bit for pilot holes
  • Wood screws (at least 2-inch long)
  • A level
  • A tape measure
  • Safety glasses
  • Work gloves

Instructions

Step 1: Prepare the Pallets

Start by cleaning the pallets with a wire brush or sandpaper to remove any dirt or debris. Then, check for any loose nails or splinters and remove them with a hammer and pliers. If you're working with treated pallets, be sure to wear a mask to avoid inhaling any dust or chemicals.

Step 2: Cut the Pallets

Using a circular saw or handsaw, cut the pallets in half lengthwise. This will create two shorter pieces that will form the sides of your firewood rack. Be sure to wear safety glasses and work gloves during this step. Once you've cut the pallets in half, you can lay them flat on the ground with the cut sides facing up.

Step 3: Attach the Pallets

Use screws to attach the two pallet halves together, creating a rectangular frame. You will want to make sure the cut sides of the pallet are facing the same direction. Start by drilling pilot holes using your drill. This will prevent the wood from splitting when you screw it in. Then, secure the pallets together with screws, spacing them evenly along the edges of the frame.

Step 4: Add Supports (Optional)

You can add more support to your firewood rack by attaching additional pieces of wood to the inside of the frame. You can use pieces of pallet wood or purchase some 2x4s from your local lumber store. This will help to prevent the rack from sagging under the weight of the firewood.

Step 5: Sand and Stain (Optional)

Once your firewood rack is assembled, you can sand it smooth and apply a stain or sealant to protect it from the elements. This step is optional, but it can help to make your rack look more polished. You can choose a stain that matches your existing outdoor furniture or the color of your home. If you're using a stain, make sure to follow the manufacturer's instructions carefully.

Step 6: Place Your Firewood Rack

After the stain has dried, your firewood rack is ready to be placed in your desired location. Choose a dry spot that is sheltered from the rain and snow. You may want to consider placing the rack on a piece of landscaping fabric or a few bricks to keep the wood off the ground and prevent it from rotting.

And that's it! You've successfully built a firewood rack from pallets. You can now stack your wood neatly and enjoy your fireplace all winter long. You can also personalize your firewood rack by adding decorative elements such as metal hooks or a custom sign. Get creative and enjoy the warmth of your homemade firewood rack.